Stamping Techniques – Create Your Own Paper by Sharon Reinhart

Pin It

Explore common stamping applications, like direct-to-paper, sponging and collage, to create eye-catching paper to use for any number of special occasions.
Direct-to-paper (DTP) is a stamping technique where an ink pad becomes the application tool. In this method, colors are applied directly from the ink pad to the paper. All types of colors of inks and papers can be used, but pay close attention to the manufacturer’s recommended advice for matching the correct ink and paper. Slow-drying pigment ink is perfect for blending, but it usually won’t dry on glossy card stock. That
being said, some pigment inks, such as Brilliance by Tsukineko, were specifically designed for use on shiny surfaces and will dry on glossy papers.

To lessen the color contamination of ink pads, always start with the lightest color and work your way to the darkest (Figs 1-3).

Figure01 Figure02 Figure03

The best way to blend the colors is to use a soft rag or paper towel, blending as you apply the color. In addition, you can leave certain portions unblended for an increasingly dramatic appearance that accents the shape of the ink pad. Every part of the ink pad can be used. For an abstract line pattern, try using the edges of a rectangular or square ink pad (Fig. 4).

Figure04

The direct-to-paper technique can be used to create blended backgrounds and/or unique patterns, by utilizing a variety of different shapes and sizes of ink pads. Square or rectangular ink pads are some examples of various shapes you will see, from the Dewdrop shape from Tsukineko and the Cat’s Eye shape from Colorbox. There’s also a wand-like adapter tool by Colorbox for use with the cat’s Eye ink pads, that actually snap into the back of the ink pad – perfect, if you don’t want to mess up a fresh manicure!

For card making specifically, I prefer to create my own direct-to-paper backgrounds on quarter-sheets and half-sheets, unless I’m cranking things out in assembly-line fashion. Here are a few things to try, once you have created your sheet:

1) Try adding a stamped greeting or rubbed-on transfer (Fig. 5)

Figure05

2) Add stamped or heat-embossed images.

3) Pressure embossing

4) Create difficult shapes – cut, punch, or die-cut (Fig. 6)

Figure06

5) Cut your paper into mosaics or shards

Sponging is yet another method for adding color, pattern, and an illusion of texture. With this technique, once again, all types of colors and inks can be used. Another medium that works great for sponging is acrylic paint. Here’s a quick rundown of some available sponging tools:

1) Stamp-It sponging block

2) Colorbox foam tips

3) Inkssentials Blending Tool & Foam by Ranger

4) There are several other options readily available that you can also use, like cosmetic wedges, kitchen sponges, children’s sponge balls and finally, plastic wrap.

Use basic stencils to create the sponge designs, moving the stencil along and building up layers of color (Fig. 7), or create your own stencil design using a favorite punch. You can create a beautiful feathered-edge effect, using torn papers (Fig. 8).

Figure07 Figure08

Sticky notes aren’t just for “to-do” lists. The notes can be torn to create a mask to complement a stamped greeting (Fig. 9).

Figure09
Collage stamping is a technique of creating a larger picture by combining smaller images. Instead of pasting materials to paper, you actually stamp several images in order to create a collage. There are numerous stamps on the market designed with several images combined on one stamp to make a collage. Collage stamping is the perfect way to get more mileage from your individual images, as well as a way to create something truly unique. You’re totally in the driver’s seat when it comes to creativity, so don’t limit yourself! Choose images that appeal to you personally or reflect the personality of the lucky individual that will be the recipient of your finished creation.

Personally, I like to use one script or background image, one solid image, and finally one fine-detail image (Fig. 10).

Figure10

This type of grouping allows your stamped collage to have texture, dimension, and visual interest, despite being only two-dimensional. With the background image, it can be literally anything – a scroll pattern, musical notes, or even a geometric pattern. Don’t be afraid to mix and match stamp styles, just like with paper and wardrobe patterns and colors. Then, leave the design as it is or bling it up a bit with rhinestones or something similar.

As with every technique, there’s always a way to take things a step further. Through this experimentation is how new techniques are born. Let’s all be the Thomas Edison’s of stamping! In closing, if you’re shooting for the moon and you desire even more creativity and experimentation, then try combining direct-to-paper, collage stamping, and sponging techniques, as well!

Leave a comment


Simple-to-Sew Fly Zipper

Pin It

This is my favorite method of inserting a simple-to-sew fly zipper. After you do it once or twice, I’m sure you’ll love it too. ~By Julie Johnson

Adjust for Your Simple-to-Sew Fly Zipper

Examine your pattern to see what pieces are used in the fly construction. Some patterns have the fly facing cut as one with the pant front pattern. This is the easiest way to do a fly zipper. If the pattern has a separate fly facing, make it into one piece by overlapping the pant front pattern so the seam lines match. Pin the pieces together, and use this alteration when you cut the fabric (Figure 1).

figure1

Zipper Construction

Before unpinning the pattern from the fabric, on the wrong side of the fabric, mark the center front stitching line with a small clip at the top of the fabric, and mark the dot at the bottom of the zipper seam with a marking pen.

figure2

Separate the pattern from the fabric. Fuse a lightweight tricot interfacing to the wrong side of the left fly facing (Figure 2). The interfacing will stabilize the fly area and keep it smooth. If desired, use your pinking shears on the edge where the fly will fold. This will feather the edge and make a smoother transition. Mark the center front stitching line on the wrong side of the fly facing.

If you’re working with a knit fabric, you may want to edge-stitch twill tape next to the fold line on the left fly facing. This will stabilize the zipper area and help to keep the zipper area from stretching or distorting. This works well on lightweight wools too (Figure 3).

figure3

If there is front detail work to be done, do the detail work before you insert the zipper. But always put the zipper in before you sew any other seams.

With the front pieces right sides together, machine-baste from the clip at the top of the fabric to the dot. Next, stitch the seam below the dot with a straight stitch, stopping 1 inch before the end of the seam. Clip to the seam line (Figure 4).

figure4

Women typically have the fly on the left, but there is no firm rule. The following instructions are for a left-side fly. If desired, substitute right for left if you want the fly on the right side.

With right sides together, pull the right fly facing away from the garment front and press the seam open (Figure 5).

figure5

Use a zipper that is at least as long as the distance from the dot to the waistline seam. If using a longer zipper, the ends can be cut off after the waistband is added. I prefer to use a longer zipper, because I never have a problem with the zipper pull being in the way of the stitching.

Place the zipper facedown on the right fly facing so the bottom of the stop is 1/4 inch above the dot. If you want the narrow fly finish shown in some pant patterns, position the zipper with the edge of the teeth along the center seam line. Make the regular-width fly finish by placing the left edge of the zipper tape along the center seam. Using a zipper foot, stitch the right zipper tape close to the teeth. Repeat along the outside edge of the tape (Figure 6).

figure6

Turn the zipper over, right side up; pull it out to the side so that it faces up and press. Next, rearrange the pant front so that the left fly facing is pulled out to one side. Position the zipper face down on the left facing, making sure the zipper is pulled over as far as possible without distorting the fabric. Pin into place, and stitch down the left zipper tape just to the side of the teeth. Stitch again along the edge of the zipper tape (Figure 7).

figure7

Open the pant front, place the pants with right side up on your ironing board. Fold over the fly facings onto the left side of the pant front, making sure they are pulled over as far as they can go, and pin into place. If your machine has good bobbin tension, it’s best to sew the next seam from the wrong side of the fabric. Stitch along the edge of the zipper tape, curving smoothly over to the center front line (Figure 8).

figure8

An alternative to a curved finish is to pivot the fabric under the needle at an angle just above the zipper stop and stitch in a straight line to the dot. Backstitch at the end of this seam for strength (Figure 9).

figure9

The final stitching can be done from the right side of the garment. too. First, baste along the edge of the zipper tape from the wrong side to secure. You can also try using glue stick to hold the two layers in place to avoid drag. Mark the stitching line with a marking pen, 11/4 inches from the fold for a wide fly finish, or 3/4 inch from the fold for a narrow finish. Topstitch down the side of the zipper, curve or angle the bottom of the fly to the center front taking care to sew below the zipper stop (Figure 9).

Lightly press the entire zipper assembly from the wrong side using a steam iron, then remove the center front basting. Wear and enjoy your simple-to-sew fly zipper.

Leave a comment


How to Recognize Quality Beads

Pin It

By Margot Potter

QualityBead

Which Came First, The Chicken or the Bead?

I recently became a chicken farmer, which if you knew me would come as a fairly big surprise. Thus far, my journey has been fraught with peril. Now hold on just a chicken-pickin’ minute, what do chickens have to do with quality beads? Well, here’s the story in an eggshell (pardon the pun).

I went to a local feed store and purchased an array of chicks. I had no idea how old they were, had no control over which chicks went into the box, no idea what hatchery had supplied them and absolutely no way of telling anything about them other than the fact that they were (theoretically) baby girl chickens of various breeds that looked for all the world like healthy and happy birds. I did notice that one of my chicks had been picked on by the others and had a bloody bottom when I arrived home, but this didn’t thoroughly alarm me at the time.

Fast forward to three weeks later and I now have some serious chicken issues. I have done everything that the books and Web sites say is necessary to have happy little chicks. Even so, my chickens came home with a few rather unnerving behavioral problems, which I am beginning to e First, assume developed while they were raised in tiny cages at the feed store for several weeks. My chickens are pecking each other with voracious violence I never knew chickens could express, and no amount of corrective measures can solve the problem. So, you are thinking, that’s really too bad lady, but what’s your point here?

My point is this—it is essential that you know what you are getting into when you buy something. Educate yourself in advance about what to look for, and you won’t be sorry later to find that what you paid hard-earned money for isn’t at all what you assumed it to be. I can’t tell you much at this point about how to buy quality chickens. As a professional jewelry designer, former bead-store owner and long-time bead aficionado, though, I can help you with some guidelines for what to look for when buying quality beads.

In general, good beads just plain look better than their counterparts. Place a quality bead next to one that is subpar and almost anyone should be able to see the difference. In particular, gemstone, crystal and glass beads have a wide variety of quality levels and it is wise to learn what to look for when purchasing these beads for necklaces and other jewelry patterns. Here is an overview of these types of beads and some of the pitfalls you may encounter.

Gemstone Beads

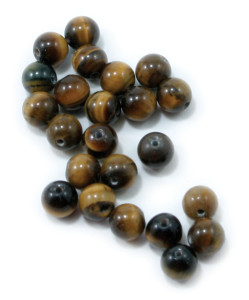
There are many different levels of quality in gemstone beads. The sizes and shapes of gem beads can be inconsistent, the color off and the drill holes extremely small and rough, all depending on where and how they were drilled and polished. I tend to favor gemstone beads from China, as most of these have been cut and drilled by machines, resulting in a very consistent bead. There are excellent gemstone beads from India, but often Indian beads are hand-polished and drilled, and the holes can be difficult to string. That being said, Jaipur is the major stone center and a wonderful variety of gem material comes out of India.

GemstoneBeads

Ask your bead dealer for sources on their beads and also try (if you are able) to test out the beads with a bit of bead-stringing wire or a head pin in the gauge you plan to use to see if the holes are well-drilled and large enough to accommodate your needs. A beader’s toolbox should contain a hand, electric or battery powered bead reamer to smooth out and expand the holes in gemstones to prevent frayed wire and to help accommodate different diameters of wire and head pins.

Look at the beads carefully before you buy. Are they consistent in size and shape? Does the gem material have the proper color? Is the color too light or too dark or is it a good expression of the gemstone? Gems are graded, and the better the grade the more expensive the bead, so this is entirely up to your pocketbook and the aesthetic appeal of the bead. Depending on the design, lower-grade beads or chips can be quite appealing and are worthy of consideration.

Your bead dealer should have a good working knowledge of the gemstones they offer. If they can’t answer your questions about their beads, it may behoove you to find a new dealer. You should also educate yourself in what to look for by purchasing a good gem and mineral buying guide and reading it carefully.

Here are some basic questions you may want to ask as you select your beads:

• Is the stone natural from origin?

• Has it been dyed, heated or irradiated?

• Will the color fade or bleed, or is it permanent?

• Is it reconstituted? • Is it hand- or machine-drilled?

• Is it glass or gemstone material (cherry, blueberry and pineapple “quartz” are actually striated glass)?

• Where was it cut and drilled?

• Hold it up to the light: Is it cloudy, dull, and unappealing?

Educate yourself about what to look for or be prepared for a big learning curve!

Austrian (not Australian!)

Crystal Swarovski® Austrian crystal has many, many imitators. In my opinion, there is nothing that even comes close. Czech glass is fantastic; we will talk about it next, but it isn’t leaded crystal. The light play and sparkle that comes off of a Swarovski bead is unparalleled. There are some pretenders out there, but if you take a moment to really look at their crystal beads you will begin to see size inconsistency, color inconsistency and dullness of the finish. Be prepared to pay a pretty price for quality, but I think it is worth every penny.

Crystals

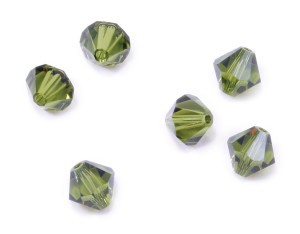
Swarovski creates a rainbow of beautiful colors, and many of them are visually identical to far more expensive gem material such as Siam ruby, Indian sapphire, indicolite tourmaline, emerald … the list goes on. Incorporate crystals with other beads to add a touch of glamour without breaking the bank account. It should be labeled as Swarovski crystal, if it isn’t, it is probably a “knockovski.”

Czech Glass

The people of the Czech Republic have been making exquisite glass beads for many, many years. You just can’t find more variety in color, shape, size, finish or style anywhere else in the world. Czech glass is amazingly affordable and offers beaders a huge range of choices.

Good glass beads are consistent in size and shape, and have vivid color expression. The finish should be smooth and shiny, never dull. The beads should have clean drill holes. There are plenty of glass beads coming out of China these days—many of them are quite unique and lovely—but none of them are Czech glass. Always ask for country of origin and inspect the beads before you buy them to avoid disappointment later.

Art Glass

ArtGlass

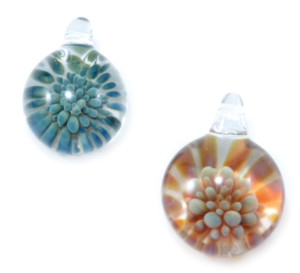
Fantastic handmade glass beads have become very popular and with popularity comes the inevitable knockoff versions from overseas. The difference between the two is in the intricacy of the details. If you want a one-of-a-kind handmade glass bead, you will pay a pretty penny; but these beads are most definitely worth it. To infuse your work with the whimsy of caned glass, millefiori or dichroic glass beads without spending a ton of money, the knockoffs really aren’t bad and are quite affordable. I use both in my work—if I’m designing a repetitive pattern, I go for the knockoffs. If I want an extraordinary pendant or focal bead, I buy directly from the artist that created it. Caned glass from India is very affordable and can be quite lovely as well.
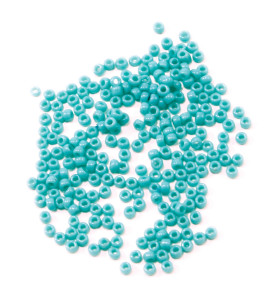
Seed Beads

Those of you who love to weave intricate beaded patterns know that near perfect seed beads come from Japan. Toho or Miyuke (the two major manufacturers) make beads of such exacting size and shape that the resulting finished beadwork is extraordinary. The next best glass seed beads come from the Czech Republic, and they are well-suited for use in simple strung designs and as accent or spacer beads. The least consistent in size and shape, and quality are seed beads from India and China. These inferior beads are good for basic craft applications but not so hot for weaving or even stringing unless you are going for a rustic look.

SeedBeads

Other Materials

Wood, ceramic, clay, bone—beads come in a huge array of materials. Look for consistent size and shape, colorfastness, detailed craftsmanship and information from the dealer on country of origin. Often these beads are knocked-off in plastic, so make sure you can hold them in your hand and look them over for quality and material. A plastic bead will usually have a seam on it and will be very lightweight.

Vintage Beads

Vintage glass and plastic beads are fun to work into your repertoire. I love to haunt thrift shops, yard sales and flea markets for deals on old beaded jewelry. There are certain materials to look for that will be particularly striking in your work.

Many vintage faceted glass crystal bead necklaces contain antique German and Czech glass beads. I love the faceted crystal with an aurora borealis finish that you can find in chokers from the 1950s. This glass has a romantic flavor and a nice solid weight to it. Make sure you are buying glass—plastic will be far lighter and won’t have the same prismatic light play.

Jet glass beads were popular in the Victorian era and the Art Deco period—sometimes you can find these striking faceted beads and if you do, snap them right up! Bakelite, Lucite, celluloid and other fun plastic beads are becoming a rarity these days and are highly collectible. Bakelite plastic was used to make all sorts of fun and funky jewelry designs in the 1940s. It has a waxy sheen and an opaque color quality and if you touch it with a hot match it smells like pine. If you find bakelite beads in a secondhand shop, you are one lucky camper!

Lucite is a more traditional plastic material. Many Lucite beads from the 1950s and 1960s are still out there for the buying, and they add a wonderful kitschy feel to your work. There are several companies that specialize in these beads if you don’t want to treasure-hunt for them in secondhand shops. Often Lucite has a sheen to it that is similar to a cat’s-eye bead or can be sometimes be striated like glass. Pop-art plastic beads from the 1960s come in all sorts of fun styles and will give you a whimsical alternative to more serious glass and gemstone beads.

Learning what to look for takes trial and error, and a bit of research, so if you are interested, I suggest you borrow some good books from your local library on costume jewelry and more information on spotting good vintage beads.

VintageBeads

Good Old Beads (or GOBs)

These very, very old beads are very, very collectible. The cool part is that even very ancient beads can be surprisingly affordable. I have come across Mayan beads, ancient Roman glass, Venetian beads and many more. Beware of the fakes, though—in particular, copies of ancient Venetian glass beads that came through Africa in the spice-trade days. When I sold Venetian beads in my shop, I never claimed that any were more than 50 years old, even though they may have been far older.

There are books out there to show you what to look for and this information can help you date a bead. I highly recommend The History of Beads by Lois Sherr Dubin. This book is fascinating and has been painstakingly researched. Beads have wonderful stories to tell, and holding an ancient bead is a powerful experience in touching history.

Buy quality beads from sources that you know and trust. In general, the bigbox craft stores aren’t the best sources for high-end beads, but this is changing rapidly. Beware the dealer that seems to have grand tales surrounding every bead; they may be master storytellers and flimflam artists. If the seller can’t talk to you intelligently and won’t allow you a close-up scrutiny of the beads you are interested in purchasing, they are probably not the best source for your beads. Look for labels that address the origin, the material, the size. A good bead shop is organized, well-lighted and has knowledgeable salesclerks. Experience is the best teacher, and as you become a bead connoisseur you will begin to recognize good beads with ease. Until then, caveat emptor (let the buyer beware!). ●

Leave a comment


Simply Serendipity

Pin It

Piece by piece and bit by bit, transform paper scraps into beautiful, one-of-a-kind, simply serendipity papers for your crafting enjoyment.

by Sharon M. Reinhart

Creating your own paper is a wonderful way to use paper scraps, “oops!” pieces from previous projects and even those not-so-thrilling papers that, although you liked when you purchased, have lost their appeal. It also gives you the ability to personalize your creation, putting a piece of yourself into the process—a little more creative license. Like many techniques, the serendipity technique has evolved over time. Here, we will explore methods that offer the ability to manipulate papers and supplies in order to create something new for use as a base or focal point in your card creations.

Serendipity is an instance whereby one finds something good accidentally. Often referred to as “serendipity squares,” this technique lends itself to far more than just squares. Much like paper collage, the name “serendipity” seems to remove the fear often associated with the term “collage” where various materials are pasted onto a single surface to create an artistic composition.

For card making, I often like to create half (51/2 x 81/2-inch) or full (81/2 x 11-inch) serendipity sheets, and sometimes quarter sheets for artist trading cards (ATCs), choosing the size based on how much material I will need.

To begin, you will need a collection of paper scraps. Listed here is a sampling of the type of papers that may be used:

• Vellum

• Cardstock—plain and printed, glossy or matte finish

• Text-weight papers—plain and printed

• Insides of security envelopes

• Suede or felt papers

• Handmade papers or parchment sheets

• Gift wrap/tissue paper

• Corrugated

• Textured or distressed papers

• Old magazines, books and dictionary pages

• Mulberry

• Chiyogami papers

Choose a coordinating color theme or even a monochromatic color theme by staying in the same color family and collecting different shades of that color. Organizing your scraps by color ahead of time helps with this process. Some resources for color combinations lie right within the colors in your printed papers themselves. Other inspiration may be found in clothing, fabric, home decor and even the wallpaper and tile aisles in the hardware store. Advertisements in magazines are also a wonderful source of inspiration.

Tear and/or cut paper scraps into 1- to 11/2-inch or smaller pieces. Adhere the pieces to a cardstock base that either coordinates or makes your paper pieces pop. There are no rules. Simply adhere the papers using a glue stick or Xyron machine, making sure edges are well secured.

Simply Serendipity

I like to start toward the center of my page and work outward, but where you begin is entirely your choice. You can even leave some of the base cardstock uncovered. Extend the pieces off the edges of the cardstock base and trim off when the page is complete to create an even edge (Fig. 1).

Figure 1

Figure 1


Working on a discarded magazine or phone book works well as you can simply turn the page to reveal a clean, adhesive-free work surface. To create your own added dimension and interest, use a variety of textured papers. Crimped, crumpled, embossed, rough and smooth, or straight edge, torn and fancy-cut edges all add to the interest of serendipity paper.

Once papers have been adhered, cut, punch or die-cut your serendipity paper into the desired size or shape. From there, embellishments may be added to the surface as shown on the 21/2 x 31/2-inch Artist Trading Cards shown below (Figs. 2 and 3).

Figure 2

Figure 2

Figure 3

Figure 3


Take your serendipity sheets a step further by adding stamped and embossed images (Fig. 4).

Figure 4

Figure 4

Note: Make sure all glue is completely dry before stamping and embossing. Some lightweight papers like mulberry paper allow the glue to seep through to the front. Alternatively, simply stamp with inks and do not heat-emboss (Fig. 5).

Figure 5

Figure 5

Drywall tape, micro beads, acrylic paint and the leftover pieces from peel-off stickers are more embellishment options, along with any of the materials listed below:

• Rubber-stamped images

• Metallic threads

• Punched shapes

• Glitter/glitter glue

• Rub-on transfers

• Rub-on metallic cream

• Marbles

• Inks

• Stickers

• Ribbon

• Magic Mesh

• Mica powders

When using the above products, it may be helpful to use a rotary paper trimmer, cutter or die-cut system. It is best to add beads after cutting your serendipity paper. As you fall in love with this technique, I am sure your paper scraps will have a completely new meaning and place of importance within your creations.

Sources: Cardstock from Bazzill Basics Paper Inc.; cream specialty paper from The Paper Company™/TPC Studio™; Mini Paper Collection from FabScraps; Family & Friends stamp set from Magnetic Poetry; distress ink pad from Ranger Industries Inc.; small glass beads, metal tip and clear adhesive from Art Institute Glitter Inc.; Glass Glintz glass embellishment from Eco Green Crafts; Beaded Circles (#S4-292) and Standard Circles SM (#S4-116) die-cuts from Spellbinders™ Paper Arts; Square Lattice embossing folder (#119976) from Stampin’ Up!; die-cutting and embossing machine from Sizzix.

Leave a comment


Card Making on a Budget

Pin It

Card making on a budget is possible. Read these money-saving tips and suggestions for cost-conscious card makers.

coins002-group

by Melony Bradley

When people discover that I make my own greeting cards, they immediately assume that I create cards not only for their uniqueness and beauty, but also because making them, versus buying them, offers significant cost savings. True, I spend much less time searching for the perfect greeting card among store options than I do crafting one, and time is money, right? But the cost of materials to make the cards can be considerable. Let me present my top-ten tips for making cards on a budget.

1. Take Stock Card stock that is! Card stock comes in an impressive array of colors, textures and patterns. It is often less expensive than patterned paper and far more versatile. It can be inked, sanded, cut, punched, torn, stamped, pieced, scored, etc. Solid-color card stock also provides great versatility, making it useful for many different applications. One of my favorite card-stock techniques is to use a watermark ink pad and rubber stamp to subtly add a background to darker colors of card stock. The rubber stamp can then be used to stamp a colored image on a coordinating color of card stock for the foreground.

2. Stamps & Punches Unlike stickers, chipboard or rub-on embellishments, acrylic and rubber stamps, and paper punches can be used multiple times in your card making. This makes them great investments. Choosing generic images for stamps and basic shapes for punches offers the most bang for your buck. For instance, a stamp with a baby image, while adorable, would likely be used for a new-baby welcome, shower,etc. On the other hand, a stamp in a bird motif can be used for a new-baby card, spring greeting or an Easter card. The bird is more general and therefore more versatile. For punches, general shapes like circles, ovals, hearts, stars and flowers offer more design options, as opposed to more specific shapes like palm trees or baby’s feet.

3. Economical Techniques There are many wonderful techniques you can use to spice up your cards without spending a lot of cash. Many of these ideas allow you to stretch your supplies by using them to achieve different looks. For instance, color washes bring beautiful pastel effects to your cards. You can create color washes with purchased products, but you can also achieve the same effects with powdered drink mixes diluted with water. Doodling only requires a pen, paper and your imagination, and allows you to create various playful effects for your cards. Stamp kissing, a popular technique that involves a solid stamp, paired with a patterned stamp, enables you to stretch your stamp collection by creating different looks with them.

4. Get Organized Whether you have the most extensive collection of card-making materials or the most limited, if your supplies are not organized, you will waste a lot of money buying things you forget you have, cannot locate, or things that have been damaged due to poor storage. For instance, consider how you might store quilling papers. Instead of immediately taking them out of the bag, keep colors separated in original packaging. This will keep you from searching through a potential tangled mess of papers looking for that perfect color for your card. Also, keep card-stock scraps together (an envelope for each color works great) and check these first when you need just a small piece to use in your card design.

5. Up-Cycle Your Stuff The “green” movement could not have come at a more perfect time. We all are looking for ways to save time and money, and help the environment. There are a whole host of household items that you can “up-cycle” and use in your card making—used dryer sheets, cardboard salvaged from empty cereal boxes, junk mail, catalogs, postage stamps, corrugated cardboard from boxes, old maps and calendars—the list is endless. If your collection of discarded items does not grow fast enough to keep up with your card-making appetite, ask a neighbor to pitch in and help. They will love the idea that their trash is being “up-cycled” into something beautiful and useful. To thank them for their efforts, you can present them with a smart and beautiful card created from items they donated.

6. Card-Worthy Bargains Using coupons, shopping sales and buying off-season are the most common ways of saving money on card-making supplies. Sign up for a free membership and then download free card designs at FreePatterns.com. One of the more innovative ideas I have seen from a local paper-crafting store is frequently held “garage sales.” They allow customers to bring in unused supplies and sell them at a significantly reduced prices to other customers. Save those 20 percent, 40 percent and 50 percent-off store coupons for larger purchases such as tools, trimmers, etc. Many local stores will honor coupons offered by the larger chain retailers. Hardware stores, office-supply stores and dollar stores offer some of the supplies similar to those available from crafting stores. For instance, brass brads can be purchased for a dramatically reduced price from office-supply stores. You can then customize them with sanding, inks and paints.

7. Take Care of Your Tools & Supplies Spend time sharpening tools and cleaning supplies. Paper-punch blades benefit from regular sharpening by punching through aluminum foil sheets several times. Blades tend to dull from repeated use, and
this keeps them functioning well. Monitor papertrimming blades and change as needed. This is a big one for me. I have wasted many sheets of card stock by not changing the blades when needed. This leads to frayed edges and a lot of frustration. Adhesive and other material can build up on scissor blades, which can dull them. Regularly remove buildup with a cleaner especially designed for the job. Use a stamp cleaner to clean acrylic stamps and stamping blocks to keep them in top shape. Spend time caring for your tools, and they will last for years to come.

8. Be a Minimalist Less is more. To save money, use fewer embellishments on your cards. Today, lines are cleaner and more sophisticated, which affords you the opportunity to use fewer products on your cards. Do you really need five different embellishments on the front of that birthday card? Two or three carefully and well-chosen embellishments will make much more of an impact.

9. Get Plugged In Use the Web to search for “free card-making templates” or “free fonts,” and other free material. There are an abundance of sites that offer envelope templates and shaped cardmaking templates for free. Likewise, many fonts can be downloaded for free and used to create attractive and thoughtful sentiments on cards. A scanner is another useful tool. Simply arrange attractive elements such as leaves, pressed flowers or other natural resources, and scan to make attractive “patterned papers.”

10. Get in Line Many card markers swear by the assembly-line method of creating cards in an effort to save time and money. Supplies can be purchased at all at once, in larger quantities, and cards can be made several at a time, often with friends and family members pitching in over coffee. Thank-you notes are an ideal project to make in large batches. One note on this: Name your card designs and keep a running list of who receives which card and when. The card will be unique and the recipient will surely notice if they receive the same card twice.

Use these tips when possible and you’ll soon be card making on a budget.

Leave a comment


The Beauty of Alcohol Inks

Pin It

Alcohol Inking Basics

Alcohol inks are designed for use on nonporous surfaces. Glossy paper, glass, metal, acrylic and plastic are all surfaces that take these inks beautifully. The beauty of alcohol inks is not just the colors and color combinations, but also the variety of items and surfaces on which they may be applied.

Consider trying alcohol ink on:

  • Glossy cardstock
  • Rhinestones
  • Buttons
  • Staples
  • Brads
  • Eyelets
  • Washers, nuts and bolts
  • Metal charms and jewelry
  • Dominoes
  • Paper clips
  • Plastic slide mounts
  • Acetate sheets
  • Acrylic sheets
  • Acrylic die cuts
  • Glass slides
  • Sea glass
  • Glass marbles
  • Mirror shapes
  • Metal duct tape
  • Tin foil
  • Metal containers

Other tools and products that are typically used with these inks are a felt applicator tool or  markers, metallic mixatives, blending solution, non-stick craft sheet and your chosen surface.

The applicator tool by Ranger has a comfortable handle and comes packaged with precut felt pieces that attach to the hook-and-loop piece on the wood mount. Alternatively, if you do not have this tool, attach the hook portion of a piece of hook-and-loop tape to a wooden block.

When you say “alcohol inks,” typically the names Tim Holtz®, Adirondack® and Ranger come to mind. There is, however, a wider variety of alcohol-based inks on the market, including alcohol ink refills for the Copic® markers. (Techniques shown and discussed here are based on the Tim Holtz® Adirondack® Alcohol inks.)

Metallic mixatives may also be used with alcohol inks or on their own. The Ranger product line has gold, silver, pearl and copper mixatives. They are packaged in the same style of bottle as the alcohol inks; however, their consistency is somewhat different. The metallic mixatives are a thick metallic medium. Prior to use, shake the bottle well. Don’t be alarmed, you will hear a clicking sound—that is the mixing ball that stirs the medium inside the bottle.

Alcohol Inks Techniques

Every recipe has its special ingredient, and the same is true in card crafting. Blending solution is that special ingredient here. It is a clear liquid that will do three things—lighten color, remove color and blend or diffuse color.

Pounce Method Photo1-PounceMethod1

  1. Apply drops of ink directly onto felt.
  2. Apply drops of blending solution to felt.
  3. Pounce applicator onto surface.
  4. Option: Add metallic mixative, blending fluid and then pounce again.

Note: The method I have seen Tim Holtz use is to apply inks, pounce, and then apply blending solution and pounce again. I like to apply the blending solution with my first drops of ink on the felt as this diffuses the inks while covering the surface. Different effects will be achieved using different methods so don’t be afraid to experiment. Photo2-PounceMethod2

Drip-Drop Method

  1. Apply blending solution to glossy cardstock/surface.
  2. Drop desired colors onto surface. Place drops inside others.
  3. Tilt paper or blow on inks to move colors.

Note: One of the newest methods is to use compressed air (the type used to clean computers) to move your alcohol inks on your paper.

  1. Another option is to pounce with applicator tool to distribute color and dab up any excess.

Photo3-DripDropMethod

Smoosh Method

  1. Squeeze drops of alcohol inks and blending solution onto craft mat or transparency sheet.
  2. Add metallic mixative, if desired.
  3. Place glossy cardstock facedown onto color.
  4. Gently pat back of piece with fingers to distribute color.
  5. Twist cardstock and lift.
  6. Continue until desired coverage is achieved. Photo4-SmooshMethod


Over Stamping Onto Alcohol Ink Background

  1. Create background following one of the methods previously mentioned.
  2. Let dry for 5–7 seconds.
  3. Stamp desired image over top. Note: Be sure to use an ink such as Archival™ ink so that it does not react with your background. Even though we have just barely inked the surface (excuse the pun) of possible ways to use alcohol inks, these techniques should keep you going for a little while. May all your creative adventures be colorful! Photo5-OverStamping

Note: These inks should be used in a well-ventilated area following manufacturer’s instructions.

Sources: Inkssentials white Gloss Paper, non-stick craft sheet, alcohol inks, metallic mixatives, alcohol blending solution, alcohol ink applicator and archival ink from Ranger Industries Inc.; cloisonné circle stamp from Michael Strong Rubber Stamps; Lacey Circles (#S4-293) and Standard Circles SM (#S4-116) die templates from Spellbinders™ Paper Arts; die-cutting machine from Sizzix.

By: Sharon M. Reinhart

Leave a comment


A Card Maker’s A to Z Guide to Better Organization

Pin It

2016 calendar

Organizational Tips

The start of a brand new year inevitably leads us to thoughts of resolving to get organized. As paper crafters and card makers, we have a tendency to gather lots of supplies and tools which can lead to clutter and chaos in our crafting space. Here are tips corresponding to every letter of the alphabet that will help you achieve ultimate organization. This card maker’s A to Z guide to better organization starts with grabbing a pencil and circling those ideas that work best for you. Then, get busy and put your plan into action.

A: Ah, those wonderful acrylic stamps. Three ring binders are the best method for storing these. Stamp sets placed in separate plastic sheet protectors allow you to flip through quickly to locate the perfect stamp for your project. Sheet protectors with protective flaps at the top or side are perfect since they keep the stamps securely inside.

B: Binders work great for storing card-making supplies, as well as completed projects themselves. Place finished cards in plastic page protectors and organize them according to birthday, get well, etc.

C: I prefer to store card stock vertically and separated by color inside specially designed plastic jacket files. Color organization allows me to keep track of my paper inventory. I also keep scraps inside a clear view storage container and try to make a rule of checking scraps before cutting entire sheets when I need only a small portion of a particular color.

D: Already feeling overwhelmed by the prospect of getting organized? Use the old rule of Divide and Conquer. Divide tasks into small steps. Grab your calendar and decide which task you will accomplish by what date. Establishing deadlines can be a real motivator, completing smaller steps while moving toward one larger goal.

E: The card is designed and almost finished. Now you need the perfect expression to complete the card. A handy reference book, such as Say it With Style, is a great tool which will assist you in quickly locating the perfect occasional expressions.

F: Scout for flea-market finds to cleverly and economically store your craft supplies. For instance, one of my favorite small item storage units is a repurposed spice rack purchased at a thrift store for a few dollars.

G: As you begin clearing the clutter, create a “giveaway” box for supplies to be donated to a well-deserving school or day care. Knowing my supplies are going to a good cause makes parting with them easier.

H: In addition to donating items, you can host a supplies swap. Invite fellow paper crafters to clean out their own clutter and bring it to your home for a fun afternoon of exchanging unwanted goods.

I: Manufacturers recommend storing ink pads upside down to keep the ink flowing to the top and to prevent them from drying out. Stack the pads vertically and place them on a shelf labeled on the side for quick locating.

J: So many ideas, so little time. Organize your ideas and moments of genius by keeping a “Journal of Inspiration” that contains magazine clippings, sketches, swatches and other visually inspiring items to inspire you during creative dry spells.

K: As you organize, make it a point to keep key supplies close at hand. Having frequently used items such as card stock, paper trimmers and adhesives close at hand is not only convenient but will save time.

L: Label, label, label— Use basic word labels to mark your supplies, or utilize more creative methods. Remember the spice rack? I attach small items that represent the contents inside on the top of the bottle with a piece of scotch tape. If I change the contents of the bottle, I simply remove that piece and replace it with another.

M: According to Julie Adachi from Marvy Uchida, “Proper storage can make markers last longer. Make sure the caps are on tight before storing them. Single-ended markers can be stored vertically with the tip side down but double-ended markers should always be stored horizontally. This will keep ink flow and color even on both ends.”

N: In addition to your journal of inspiration, a portable, purse-sized notepad is a great way to record simple thoughts and ideas you have while traveling, waiting for appointments, or commuting to and from work.

O: Creating a giveaway/donate pile is easier said than done for many of us. Using the “one year rule” can help–if it’s been a year since you last used it, it’s time to give it away.

P: Use a plastic over-the-door shoe organizer to store punch sets.

Q: Quilling papers provide a unique challenge to organization. According to industry experts, cardboard or plastic contains with dividers are some of the best products to use for storing quilling papers and finished quilled pieces.

R: If back issues of magazines are cluttering your space, consider reducing print copies by signing up for digital subscriptions of your favorite paper-crafting magazines. For example, subscribing to CardMaker digitally gets you access to two years of back issues, all without taking up precious storage space.

S: Silk flowers are another embellishment that can easily be stored in recycled spice rack bottles.

T: Corralling tools can be the most challenging task of all. Small buckets fitted with nylon-pocketed organizers are an economical and handy solution.

U: Unify a hodgepodge of display containers by painting them all in the same colors or by covering them with coordinating patterned papers.

V: Vertical space should be maximized. A shelving unit stacked on a desk provides additional space for storing containers full of embellishments, wood-mounted rubber stamps or other essential items in an aesthetically pleasing manner. Hang plastic shoe storage bins inside closets for stacking 12 x 12-inch papers, maximizing the space from the floor to the closet rod. Hanging tiered metal baskets, traditionally reserved for storing fruits and veggies, hold supplies while taking advantage of vertical space.  An open display of wood-mounted stamps is handy and attractive.

W: Wood-mounted rubber stamps Store wood-mounted rubber stamps to show the array of themes and motifs. Another resourceful idea is to use recycled clear VHS tape cases, with stamps sorted by theme, and the sides of the cases labeled for quick location.

X: X it off—celebrate each time you accomplish small things done by literally crossing it off the list. This gives you great satisfaction and motivates you to move forward with more organizational duties.

Y: Whatever your organizational plan or style, make it a system that works for you. Whether color-coding, sorting by theme, organizing according to season or occasion, make it a system that makes sense to the way you craft.

Z: Add beautiful elements to your organized card-marking stash with fun handle-painted scissors, a special vintage trinket box to hold embellishments or a hot pink hot tool. These add Zen to your collection of tools and supplies, and keep you feeling creative and inspired.

By Melony Bradley

Leave a comment


Free Fashion Scarves Patterns for Young Knitters

Pin It

Summer has arrived and many parents are seriously trying to limit the time their kids are spending on electronic devices by looking for outdoor activities. But what about rainy days or long car rides? This may be the time to develop a hobby for you and your young knitter!

Big Needle Scarf Set

The craft of knitting is growing and rapidly engaging those of a younger age. Knitting has real benefits because it requires concentration and the use of fine motor skills. More importantly, it gives young knitters a sense of accomplishment to create something with their own hands. It can be hard to find patterns that appeal to young knitters and also that cater to their beginning skill levels. At Free-Knit.com, you can download dozens of free knitting patterns for scarves that meet both of these challenges.

Depending on the type of yarn that is used, different types of scarves can be worn all year long. You can find a lot of different styles in winter clothing knitting patterns. Textured blocks scarf patterns are a good way to practice different types of beginning stitches as well.

Download several beginning free scarves patterns and have kids choose someone special to make a scarf for. Or, perhaps they can choose a local shelter to donate one to? Kids can even start their own knitting clubs and collectively come up with charitable projects or fundraising plans. Newer knitters can also benefit from something like the big needle scarf set to help with dexterity of beginner projects.

Explore the advantages of incorporating knitting into the rest of your summer activities and see what kind of creativity your young ones can unleash!

Leave a comment