Wire Wrapping in Beading: Wrap It Up, by Lisa Galvin

Pin It

Just when you think you’ve done all you can do with beads, along comes wire wrapping — another idea that will send you diving into your stash of baubles to explore the possibilities! Set your inhibitions aside, get your imagination ready and go WILD with wire wrapping beads!

Available in a rainbow of colors, beading wire is sold in a wide variety of diameters (referred to as “gauge”). Strange as it may seem to many of us, the larger the gauge number, the smaller the wire actually is. For example, an 18-gauge wire is much thicker than a 26-gauge wire. The most common wire sizes used in jewelry making range between 16- and 28-gauge.

The correct beading wire size to use for any given project is typically a matter of preference; however, bead-hole size and end use of the bead(s) or beaded project are the best deciding factors. Projects that will take a lot of abuse or carry much weight during normal wear and tear should use heavier diameters ranging from 16- to 20-gauge. In addition to beading wire, beading eye or head pins can also be wrapped around beads to accent.

Much of wire wrapping can be done with bare hands; however, some basic tools for wire-working include: roundnose, chain-nose, wire-looping and flatnose pliers, as well as wire nippers. While not a necessity, nylon jaw pliers are handy any time you’re working with beading wire to help straighten bends without scratching colorized wire surfaces.

While the possible variations are virtually unlimited, shown here are some basic wire wrapping techniques to get you started.

Wrap & Swirl Bead

1. Cut a 6-inch length of 22-gauge wire (shown below in red). Create a stronger loop using the thin wire by wrapping twice around round-nose pliers at center of wire length (Fig. 1a).

wire wrapping figure 1A

Figure 1A

Note: Wrap only once if using 18- to 20-gauge wire. 

2. Slide bead onto one wire end and push to just below loops. Wrap remaining wire end twice around the first (center) wire, going just above bead. Continue with same wire, bending down around bead to bottom. Wrap twice around wire extending through bottom of bead, bend up around opposite side of bead and wrap 2-3 times at top. Cut excess wire at top of bead only (Fig. 1b).

wire wrapping Figure 1B

Figure 1B

3. Use round-nose pliers to make a loop on remaining wire end (end extending below bead). Use flat-nose pliers to bend, creating spiral shape shown below (Figs. 1c and 1d).

wire wrapping Figure 1C

Figure 1C

wire wrapping Figure 1D

Figure 1D

Wire-wrapped “Bulb” Style Bead

1. Cut an 8- to 10-inch length of 26-gauge wire (shown below in magenta). Create a loop same as shown in Fig. 1a and twist wire ends together twice, going just below loops.

2. Insert one wire end through bead, wrapping the other around outside of bead and twist both wires together once at bottom of bead.

3. Bring wire end that was first wrapped around outside of bead up through hole at bottom side of bead and pull through at top of bead. Insert through loop at top of bead then back around outside of bead to bottom of bead again (Fig. 2a).

wire wrapping Figure 2A

Figure 2A

4. Repeat with the second wire, bringing the wire end upward around bead and inserting through hole at top; pull wire through at bottom of bead once again.

5. Continue the wrapping process to surround bead (or as much as bead-hole size will allow). When all but 2 inches of each wire end remain, bring ends to top of bead and wrap around base of loop, creating a small bead cap (Figs. 2b and 2c). Trim excess wire, tucking or wrapping ends inward to conceal. A drop of glue may be added if needed to secure ends.

wire wrapping Figure 2B

Figure 2B

wire wrapping Figure 2C

Figure 2C

Wire Wrapping Other Types & Styles of Beads

Wire Wrapping to Make a Chain

Create a chain of wirewrapped beads (Fig. 3) by creating loops on both bead ends. Curl one or both wire ends and form to fit on side of bead as an accent. When adding a second and any subsequent beads to the chain, link with previous bead before closing and wrapping the final loop. Continue to create length needed, attaching clasps at end.

wire wrapping Figure 3

Figure 3

Wire Wrapping to Make a Pendant or Drop Earring Pieces

Connecting an assortment of beads together to create a larger piece can be fun (Fig. 4). For best results select a few “key” beads that will act as the focal point and build from there, adding more wire if needed to create your own arrangement.

wire wrapping Figure 4

Figure 4


Beads of all shapes, sizes and colors can be wrapped to add an interesting “flair”. A fun challenge you might try is to select the “ugliest” bead in your stash (as if there are ugly beads), wrap it with wire, adding additional seed or E beads as you wrap. You may be amazed at the outcome. Check out the photos below for inspiration!

Wrapped Amber Bead

Wrapped Amber Bead

white bead wrapped with purple wire

White Bead Wrapped with Purple Wire

Green-tinted Bead Wrapped with Green Wire

Green-tinted Bead Wrapped with Green Wire

Like the look of wire-wrapped beads,  but don’t have time or interest in wire wrapping them yourself? Not a problem. Bead manufacturers have taken care of this with individual or packaged wire-wrapped beads readily available at bead and craft stores.

2 Comments


Holey Moley! Creative Uses for Hole Punches in Card Making, By Kimber McGray

Pin It

Card Making Tips & Techniques: Find uses for hole punches, some of the most basic crafting tools, to create one-of-a-kind card designs that really pack a punch!

uses for hole punches

Hole Punch for Card Making

As enthusiastic paper crafters, we are always on the lookout for the newest, latest-and-greatest tools and supplies. Despite the constant influx of new products into the market, there are tools and supplies that remain my go-to items, even though they aren’t the latest-and-greatest. For me, hole punches fall into this category. My hole punches are like old friends. They are always there for me and serve many functions — and they hold up for years. A standard hole punch may seem like a simple, single-function tool, but let’s stop for a moment to consider the many uses for hole punches.

With a basic hole punch, you can create a fluttering trail of a butterfly, linear borders and decorative backgrounds. The punch can lend itself in more functional ways as well. Try running ribbon through a row of punched holes, or use your punch to create notches on the side of your paper to help keep a length of ribbon in its place.

There are a few simple tips that might help you become more successful in finding creative uses for hole punches in your card projects. Before taking the punch to your paper, grab a pencil and draw your pattern or line to help you stay on track when punching. If you are going for the linear look, also mark the increments so the punched holes are not only straight but also equally spaced. Play with different sizes of hole punches to add interest and variety to your projects. The  standard 3/16-inch punch is going to  be your go-to size for most projects,  but don’t forget other punches you have in your collection.

The next thing to consider when discovering uses for hole punches is working with a separate, smaller piece of paper and then adding it to your card front. Most hole punches only have about a 1-inch reach, so if you want a hole in the middle of your card you are going to need to figure out the logistics of it before proceeding. Yes, there are great tools on the market that will allow you to easily punch all the way to the middle of your project, but if you plan ahead a bit you can achieve a similar look without any fancy tools.

Finally, once you’ve created your holey masterpiece, you’ll want the holes to stand out as much as possible. If you layer your punched paper over a contrasting paper, the design will stand out beautifully. Light papers layered over dark, and vice versa, will lend to beautiful, finished projects.

With your trusty old hole punch as your crafting companion, there’s simply no end to the creative fun you can have as you find uses for hole punches in your card making projects!

3 Comments


Beautiful Border Design in Card Making by Connie Vogt

Pin It

Border design in card making can make the finished card project look fantastic, and it can also be the focus of the project itself. Just as fine artwork is enhanced by displaying it in a beautiful frame, borders can be used to put the finishing touches on a handmade card. Border punches are a quick and easy way to add interest to a card, but don’t stop there. Read on for more card making techniques to jazz up your cards with beautiful borders.

BeautifulBorders

The Cutting Edge

Crafting tools for card making have come a long way from the early days. Before the advent of border punches and die-cutting machines, you simply used the handiest tool in your arsenal — your fingers — to tear the edge of a card. Some ingenious crafters then learned to create a scalloped edge with a corner- rounder punch, or how to use decorative scissors to finish off the corners on a card-stock mat. Today, we have a wide range of card making tools readily available to make creating borders a snap.

  • Torn edges are still a favorite among stampers. For a smooth finish, tear the strip to be discarded away from you. For a more textured look, tear the strip to be discarded toward you, and add a touch of ink to the torn edge to highlight the exposed fibers.
  • Another simple technique that doesn’t require any special tools is snipping the edge of your card stock and roughing it up. Use this approach to create a grassy edge, like the bottom of a hula skirt or fringe on a snowman’s scarf. Use decorative scissors to trim off the edge of your card or cut a strip of card stock in half and create two different borders at one time. Flip the scissors over to create yet another look. Whichever method you choose, align the blade design with a portion of the previously cut section to ensure a continuous border design.
  • Border punches are available in many lovely designs, and most have grids, printed designs or registration marks to assist you with alignment. Look for the multifunction punches that cut and emboss a border design in one easy step.
  • Die-cut border strips work much like border punches except that they require a die-cutting machine. The added benefit of these strips is that they can be used like a stencil to color a border design or add color to enhance the cut strip.

Crossing the Border in Card Making

Now that we’ve covered the basics of creating borders, let’s take it a step further:

  • Cut two identical borders and position them back-to-back with a complementary color of card stock underneath to highlight the newly created border design.
  • Run a ribbon through the holes in a border design, adding a bow or knot for more interest.
  • Create a mat or decorative strip by punching or cutting both edges.
  • Create a frame using border punches that have matching corner punches, or create a template to help you miter the corner using just the border punch.

Out of Bounds

Borders are most commonly found as straight lines or strips along the opening edge, but they can also be used along the fold, as an element of the overall design, or even as the focal point of a card.

  • Layered border strips in three complementary colors with the same design or three different designs cut from the same color card stock can add visual interest.
  • Simple scored lines on either side of a design will draw attention to it.
  • Punched or die-cut shapes adhered around an image or along the edge of a card-stock strip create a unique border design.
  • Row after row of borders in a monochromatic or tonal color scheme makes an elegant card front.
  • Punching around all the edges of a square piece of card stock with a border punch will result in a matching medallion. Measure the length of the design and repeat to determine the size of square that will work best with your punch.
  • Simple stamping or paper piercing around the edge of your border design is an easy way to make the design pop. You can also stamp a border, and then trim around the outer edge to enhance it.
  • A stamped border on the inside of your card can become a hidden closure. Fold your card so that the back panel extends beyond the front panel by about an inch or so. Stamp your design on the inside of the back panel so that it is visible when the card is closed. Use a craft knife and cutting mat to cut along one portion of your stamped design and, violà, you have a hidden closure for your card!

Gather up some card stock, a few rubber stamps and punches, and give yourself permission to live life on the decorative edge of card making! Just try one or several of the border design techniques detailed above in your card making projects and explore the creative designs you can come up with.

1 Comment


Tip-Top Curtain Sewing Patterns for Toppers by Carol Zentgraf

Pin It

Looking for a curtain sewing pattern to perk up the top of any curtain panel or valance with details that go beyond the basic rod pocket or hanging tabs? You’ll find some options below. Whether you want to showcase a coordinating lining fabric with reverse tabs that wrap over the drapery rod or create unique tabs, get a curtain sewing pattern that’s guaranteed to add a designer look to your window.

REVERSE  SCALLOP-TOP CURTAIN SEWING PATTERN

Tip-TopCurtainToppers_Page_2_Image_0001

Materials for the Reverse Scallop-Top Curtain Sewing Pattern

Note: Each panel is 53 x 56 inches as shown; adjust length and width as desired for your window. To plan yardage for a different curtain length, measure from the top of the mounted drapery rod to the desired length and add 10 inches for hems and top treatment.

  • 2 yards each of two 54-inch-wide decorating fabrics (coordinating prints) for each finished panel
  • Scraps of coordinating solid-color fabric for button covers
  • 12 (7/8-inch-diameter) button forms for covered buttons
  • 12 (3-inch-long) tassels with hanging loops
  • 11/4-inch-diameter or smaller drapery rod
  • Pattern tracing cloth or paper
  • Permanent fabric adhesive
  • 1/4-inch-wide double-stick fusible web tape
  • All-purpose thread to match fabric
  • Contrasting 12-weight cotton thread for topstitching tabs
  • Size 14 or 16 universal or topstitching sewing machine needle
  • Button thread or buttonhole twist and beeswax
  • Large-eye hand-sewing needle
  • Basic sewing tools and equipment

Cutting Instructions for Reverse Scallop-Top Curtain Sewing Pattern

  • Cut each decorator fabric panel to 66 inches (or the desired finished length plus 10 inches).
  • Cut a 12 x 54-inch strip of pattern tracing cloth or tracing paper.
  • Enlarge the scallop pattern (Figure 1) and trace onto the cloth or paper, tracing six scallops across the length of the paper. Cut out the pattern. For other curtain widths, you will need to add or subtract scallops or adjust the width of the pattern given to fit full scallops across the panel.

Tip-TopCurtainToppers_Page_1_Figure1

  • Layer the decorator fabric panels for each curtain on a flat surface with right sides together. Center the scallop pattern along the upper edge of the panels with the curves toward the edge (Figure 2). Trace around the scallops. Cut out both layers along the traced lines.

Tip-TopCurtainToppers_Page_2_Figure2

  • From the solid fabric, cut (12) 2-inch-diameter circles to cover  the buttons.
  • Assembly for Reverse

Scallop-Top Curtain Sewing Pattern Instructions

Use ½-inch-wide seam allowances.

  1. Sew the two panels together along all edges, leaving a 10-inch-long opening for turning in the lower edge. Trim and clip the curves and corners; turn right side out and press, turning in the opening edges. Slipstitch the opening edges together.
  2. Fold the scalloped edge to the curtain right side so the scalloped section measures 9 inches from the top to the lower edge of the scallops. Pin in place across the upper edge.
  3. Apply short lengths of fusible web tape to the underside around the scalloped edges and fuse the scallops in place following the manufacturer’s directions.
  4. Thread the sewing machine needle (size 14 or 16) with contrasting 12-weight thread and topstitch the scallops in place, stitching ¼ inch from the finished edge.
  5. Cover the buttons with the contrasting fabric circles following the package directions.
  6. Wax the button thread or buttonhole twist (see Snip-It on page 78) and use to sew a button in the center of each scallop 1 inch above the lower finished edge. For the easiest sewing, insert both thread ends though a large-eye hand-sewing needle and stitch through the fabric from front to back. Knot the thread ends several times and trim the excess thread.
  7. Hang a tassel loop over each button. Twist the loop cords slightly and glue together using a very small amount of fabric adhesive.
  8. To hang the panels, insert the drapery rod through the pocket above the stitched-down scallops.

Tip-TopCurtainToppers_Page_2_Image_0002

ROUND ‘EM UP TOPPER SEWING PATTERN

Tip-TopCurtainToppers_Page_3_Image_0001

Round ‘Em Up Curtain Sewing Pattern Materials

  • Novelty cowboy print curtain panel(s) in length to fit window with upper edge unfinished
  • 3½-inch-wide strip of suede or nonwoven faux-suede in a length equal to the finished width of the curtain panel
  • 1¾ x 2¾-inch metal conchos (determine required number in step 1)
  • 2 (16-inch-long) pieces of leather lacing for each concho
  • Leather branding tool with star attachment
  • Permanent fabric adhesive
  • Self-adhesive, double-sided basting tape
  • Basic sewing tools and equipment

Assembly for Round ‘Em Up Curtain Sewing Pattern

  1. To determine the number of conchos needed, measure the curtain panel width. You will need one concho for each outer edge. Mark the outer edge positions 1 inch in from the finished edges, and then determine the number that will fit between them with approximately 5 inches of space between conchos. Adjust this spacing as needed and mark the concho positions on the curtain panel wrong side.
  2. Align the ends of two pieces of lacing at each mark at the upper raw edge on the wrong side of the curtain panel. Stitch in place a scant ½ inch from the raw edge.
  3. With raw edges even and the right side of the suede strip against the wrong side of the curtain panel, stitch ½ inch from the raw edges, catching the leather lacings. Use basting tape within the seam allowance to hold the layers together for stitching. Do not use pins on the suede because they will leave permanent holes.
  4. Turn the suede strip to the right side of the curtain panel and press with a warm iron from the fabric side at the upper edge, not on the suede. Use basting tape on the underside to secure the lower edge of the suede strip to the curtain for stitching. Stitch close to the lower edge of the strip (Figure 3).
  5. Center the conchos on the suede strip with each concho center directly below the leather laces. Use fabric adhesive to glue the concho edges in place and allow to dry completely.
  6. To emboss the suede strip, work on an ironing board or other heatresistant surface. Attach the star stamp to the branding tool and plug the tool into an electric outlet. Press the heated tool firmly onto the suede and lift straight up. Repeat to emboss stars as desired around the conchos.
  7. To make the hanging loops, form each one and tie an overhand knot, adjusting so all loops are the same length across the curtain panel. Thread the ends through the concho center.
  8. Slip the leather loops over the curtain rod and adjust the curtain fullness as desired.

Tip-TopCurtainToppers_Page_3_Figure3

BUTTONED-RIBBON TAB TOPS CURTAIN SEWING PATTERN

Tip-TopCurtainToppers_Page_4_Image_0001

Materials for the Buttoned-Ribbon Tab Tops Curtain Sewing Pattern

  • Curtain panel with unfinished upper edge (see Note below for sizing)
  • Ribbon (determine yardage in step 2) 11/4-inch-wide grosgrain: 9 inches for each tab 7/8-inch-wide grosgrain: 9 inches for each tab 1/4-inch-wide decorative ribbon: 9 inches for each alternate tab
  • Porcelain or other decorative buttons (1–11/4-inch-diameter), one for each tab
  • 1/4- and ½-inch-wide double-stick fusible web tape
  • Liquid seam sealant
  • All-purpose thread to match fabric and ribbons
  • Basic sewing tools and equipment

Note: In addition to the bottom hem allowance, add 3 inches for the selffacing at the upper edge. Determine the desired finished panel width and then add 1½ inches for side hems and an additional 2½ inches per pleat.

Assembly for Buttoned-Ribbon Tab Tops Curtain Sewing Pattern

  1. Turn under and press 3 inches at the upper unfinished edge of the curtain panel. Turn under and press ½ inch at the raw edge. Pin in place and stitch ¼ inch from the hem edge. Turn under and press ½ inch at each side, and then turn and press an additional 1-inchwide hem. Edgestitch in place
  2. Determine the number of tabbed pleats that will fit across the panel. The box pleats should finish to 1¼ inches wide. Plot the pleat locations with the outermost pleats located 1½ inches from the finished side edges and approximately 4½– 5 inches between the pleat edges. Note the number of pleats required to determine how many buttons and how much yardage of each ribbon you will need for the loops. Note: Every other loop in the sample has three ribbons and the alternate loops only two ribbons. You may use one, two or three ribbons for the loops as you wish for the desired finished effect.
  3. Cut the ribbons into 9-inch lengths. To assemble each tab, fuse ½-inchwide fusible web tape to the center of the 7/8-inch-wide ribbon. Remove the paper backing from the strip and center and fuse the ribbon to the 1¼-inchwide ribbon. On half of the ribbons, repeat to apply the ¼-inch-wide ribbons on top of the second ribbon. Trim the end of each ribbon as shown in Figure 5.
  4. Pin each tab to a pleat with the points of the shaped end 3½ inches below the curtain upper edge. Turn the remaining ribbon under to form a loop that is 2¼ inches deep; pin the short end in place on the underside of the curtain. Stitch across each ribbon ¼ inch from the upper edge of the curtain panel (Figure 5). Treat the cut ends of the ribbon on the underside of the curtain with seam sealant to prevent fraying.
  5. Sew a button to the lower edge of each tab.

Tip-TopCurtainToppers_Page_4_Figure4 Tip-TopCurtainToppers_Page_4_Figure5

BUCKLE ME UP TAB TOPPER CURTAIN SEWING PATTERN

Tip-TopCurtainToppers_Page_6_Image_0001

Materials for the Buckle Me Up Tab Topper Curtain Sewing Pattern

  • Curtain panel with unfinished upper edge (side and bottom hems completed)
  • Matching fabric facing strip, 4 inches wide and the length across the panel width plus 1 inch for turn-under allowance
  • 3 x 14-inch fabric strip for each tab (determine required number in step 1)
  • Overall buckle with button for each tab
  • All-purpose thread to match fabric
  • Basic sewing tools and equipment

Assembly for Buckle Me Up  Tab Topper Curtain Sewing Pattern

  1. To determine the number of tabs you will need, measure the width of your curtain panel. Plan for one tab 1½ inches from each finished side edge, and then evenly space tabs 5–6 inches apart across the upper edge. Mark tab placements on the curtain panel right side at the upper edge.
  2. To make each tab, fold the fabric strip in half lengthwise with right sides facing. Stitch ¼ inch from the long raw edges. Adjust the strip so the seam is centered in the strip and stitch across one short end (Figure 6).
  3. Turn right side out and press. With the raw edges even and the seam against the curtain right side, center each tab over a placement line. Machine-baste a scant ½ inch from the raw edges.
  4. With right sides together, sew the facing strip to the upper edge of the panel. Turn to the wrong side and press, turning under ½ inch at each short end. Stitch close to the folded edges.
  5. Follow the buckle manufacturer’s instructions to attach a button below each tab 1½ inches from the curtain panel upper edge.
  6. Thread the raw end of each tab through a buckle and adjust so all loops are the same desired length. Machinestitch the end in place or use fusible web tape to secure the end.
  7. Snap the buckle over the button and slide the loops onto the curtain rod.

Tip-TopCurtainToppers_Page_5_Figure6

Top It Off: Ideas to Spice Up Your Curtain Sewing Pattern
Looking for more upper-edge embellishment ideas for your curtain sewing pattern? Consider adding grommets or buttonholes to the header of a panel in your curtain sewing pattern, then tying them in place with lace, ribbon, cord or fabric ties. You can even make extra-long buttonholes and thread a narrow rod through them. How about hanging options for your curtain sewing pattern other than drapery rods? Attach knobs, hooks or drawer pulls to a window frame or the wall above a window and hang the tabs over them.

Tip-TopCurtainToppers_Page_5_Image_0002

Or, cover buttons and sew them to the top of a lined panel with a flipped over edge. Sew a thread loop to the wrong side of the fabric behind each button and hang the loops on nails.

Tip-TopCurtainToppers_Page_5_Image_0001

1 Comment


The Magic of Memory Wire

Pin It

Memory wire that remembers its shape? What a fun concept! There aren’t too many things in this life that can be stretched out, only to return to their original form once released. From stylish and sophisticated, to projects made by or for kids, this versatile beading wire can be used for more than just the obvious!

Made of tempered stainless steel, memory wire is sold in coil forms ranging from ring size to bracelet and necklace diameters. Tarnish and corrosion resistant, you’ll find it in shades of silver and gold with plated versions of the same metal tones also available.

One size fits all, unlike ordinary wire, and the unique ability to “remember” its curved nature gives it a “grip” factor. Stretch out a coil and you’ll feel it almost pulling the ends back together. Release too quickly and it just might flip out of your hands as it rapidly seeks to return to its circular form.

Don’t let its thin gauge (or wire thickness) fool you; this type of beading wire is made of hardened steel. It’s strong and can be difficult to cut, especially if you’re using the wrong type of pliers. Whatever you do, never use your best pair of jewelry wire cutters or nippers to cut memory wire. Doing so will leave your pliers  with a damaged cutting surface, and if you do manage to cut the wire with these tools, they will create a very sharp edge.

If you work with memory wire, you’ll want to invest in a pair of memory wire shears. As the name implies, this tool shears (or breaks) the tempered steel wire rather than simply cutting it. The result is a flat and clean edge.

Wire lengths needed for a given beading project are sometimes listed in instructions as an exact measurement, referring to the length measured when the wire is stretched out. You’ll commonly  find it listed by the number of continuous coils (or half coils) needed. Rings and bracelets can range from 1-5 continuous coils of beading wire, while necklaces typically call for 1-2, depending on the style.

Before sliding beads onto wire, finish one end to prevent beads from slipping off the opposite end as you work. You can make a simple loop by gripping a wire end with pliers and then bending it back towards the outer edge of its natural curve to form a loop. Slide on your chosen beads, charms and spacers, then leave a quarter inch of wire and repeat on the opposite end. Another option is to attach end caps. Square-, cone- or ballshaped caps can give ends a professional “polished” look. End caps are available with or without attached rings for adding beads or charms.

You can use a jump ring to attach charms, chain lengths or toggle clasps from either looped wire ends or end-cap rings. Another fun option is to string a coordinating bead (or beads) onto a head pin, and attach it to the end of your design. Samples of some of the possibilities are shown below.

Memory wire examples

Memory wire examples

Perhaps one of the biggest questions is how best to attach end caps to the wire. For a better bond, giving glue something to grip when attached to the smooth wire surface, ends should be lightly sanded using fine grit sandpaper to scuff. Cyanoacrylate glues such as Beadalon® Bead Fix™ or Super Glue®  are the best choice to attach end caps. It is also possible to use a two-part epoxy, but this requires a longer (24 hour) set time, making it more difficult to use.

Slide one or more focal beads onto the beading wire or fill it completely with seed, E, or other beads and metal spacers to create fun beaded jewelry. Leave beads free to slide on memory wire, or separate to hold their position with lengths of hollow rubber tubing. This tubing is sold in black and sheer opaque varieties. It comes in sizes ranging from 1.7mm to 6mm and is easily cut with scissors. Cut it into short or long lengths and use to create spacing to add focus to beaded portions of the piece of beaded jewelry.

Don’t limit memory wire to jewelry only. Napkin rings, glass charms, ornaments and other home decor projects are also fun to explore. Try cutting shorter lengths of the wire and bending loops at ends, creating curved  “eye pins” that hold their shape. Several individual coils of any given memory wire size can be connected using spacer bars to form a single ring or bracelet.

Once you begin to explore the endless uses for memory wire, you may just find that you can’t get enough of it! Fast, fun and easy to use, this beading wire is a great addition to any crafter’s repertoire.

By Lisa Galvin

Leave a comment


Reverse-Image Stamping by Connie Vogt

Pin It

Reflect your creativity with reverse-image stamping. Summertime conjures up thoughts of picnics and family outings at the lake. Remember the first time you looked into a lake and saw your own reflection? What if you could recreate that imagery with your stamping? With your favorite stamp and a few basic stamping supplies you can do just that.

Reverse-Image Stamping Technique Basics

Reverse-image stamping is a technique used to create a mirror image of a stamped image. The easiest method and most common way to achieve this look is this: To reverse the image, ink the stamp of your choice, and then stamp it onto a flat block rubber stamp. Immediately stamp the image on the flat block rubber stamp onto your card stock.

Some nonporous surfaces, such as a template plastic, acetate or heavy wax paper, can also be used as a transfer surface for this technique. Stamp the image on the surface of choice, flip the surface over onto your card stock, and then gently rub or use a brayer to transfer the image. To avoid smearing the image, be careful not to shift the surface when braying or rubbing.

As with so many other stamping techniques, there are certain factors to consider when reverse-image stamping:

  • Not all images are appropriate for reverse stamping — especially letters or words.
  • Remember that your reversed image will be a second-generation stamped image. The ink will be lighter than for the original image, which is fine for reflections and shadows, but not when you want mirrored images side by side.
  • A slow-drying ink, such as a pigment ink, with a very juicy ink pad will help with the tone of the transferred image.
  • Heat embossing may also help to keep the ink colors compatible between both images.
  • If you use a dye-based ink, try “huffing” on the reversed image before stamping it. The moisture from your breath may help to reactivate the ink for a darker image.
  • A stamp positioner can be an invaluable tool for aligning the second image with the original. The plastic template piece can also be used to reverse and transfer the image.

Reflections in the Water Reverse-Image Stamping

Remember that picnic by the lake, and how pretty the reflection of the trees and flowers looked in the soft ripples of the water? Reflections in water are generally lighter and less defined than the original image. These effects will be created as part of the second-generation stamping. Give your artwork a finished look adding water effects with airbrushing or color dusting. Remember to mask off your main images before adding these effects to preserve their original look.

Me & My Shadow Reverse Image Stamping

A shadow is a lighter version of the original object and is an ideal use of reverse-image stamping since the ink will be lightened during the transfer process. When stamping on vellum, flip the stamped image over so that the inked side is next to the card. This will not only reverse the image but will also give it an ethereal feel. Inking your image with a pearlized pigment ink, such as Brilliance from Tsukineko, will also add to the illusion.

Mirror Image Stamping

When creating side-by-side mirror images, you want the color intensity to be the equal on both. To lighten the ink on the first image, stamp off on scrap paper before stamping on your card. Alternatively, you can stamp the image on one side of acetate or transparency film, and then flip the acetate over to reverse and stamp the image a second time.

Reverse a Negative Stamping

The traditional reverse-image stamping technique is used when you want to flip the orientation of a stamped image, either horizontally or vertically. But what if you want to make a reverse image from an outline stamp, and at the same time, turn it into a bold stamp? B y pressing your uninked rubber stamp into heated moldable foam, such as Penscore, you will create an impression that not only reverses the orientation of the image, but also turns the “negative” space on the stamp to “positive” space. Ink the foam stamp and use it in the same manner as you would a rubber stamp.

Change of Direction in Reverse-Image Stamping

By changing the direction or orientation using one of the reverse-image stamping techniques, you can change the direction of your artwork. On your next project, take your creativity in a new direction by going in “reverse.”

Rainbow Petals Reverse-Image Stamping Project, design by Connie Vogt

Rainbow Petals Reverse-Image Stamping Project

Rainbow Petals Reverse-Image Stamping Project

Inside of Rainbow Petals card

Inside of Rainbow Petals card

Materials:

  • Card stock: copper, white, blue
  • Moldable foam
  • Stamps: Dotted Petals, Walk Beside Me sentiment
  • Pastel rainbow dye ink pad
  • Sponge dauber
  • Pale gold leafing pen
  • 12 inches 1/2-inch-wide purple ribbon
  • Heat tool
  • Adhesive foam dots
  • Paper adhesive

Form a 4 1/4 x 5 1/2-inch side-folded card from copper card stock. Stamp flowers randomly onto a 4 x 5 1/4 inch piece of white card stock. Use sponge dauber to ink edges purple. Wrap ribbon around bottom of rectangle and tie a knot on right side; trim ends. Adhere to card front.

Heat moldable foam with heat tool. Quickly and firmly, press flower stamp into foam to create a reverse image. Ink and stamp reverse image onto white card stock. Trim to 2 3/4 x 4 inches. Outline edges with leafing pen. Let dry. Adhere to blue card stock; trim a small border. Adhere to card front with foam dots.

For inside, stamp sentiment onto upper right corner of a 4 x 5 1/4-inch piece of white card stock. Randomly stamp flowers along left and bottom edges of rectangle. Sponge edges purple. Adhere inside card.

Sources: StampMagic foam from Clearsnap Inc.; Dotted Petals stamp from Penny Black Inc.; Walk Beside Me stamp from Verses Rubber Stamps; rainbow ink pad and sponge dauber from Tsukineko Inc.; leafing pen from Krylon.

Me & My Shadow Reverse-Image Stamping Project, design by Connie Vogt

Me & My Shadow Reverse-Image Stamping Project

Me & My Shadow Reverse-Image Stamping Project

Materials:

  • Card stock: blue, white, pink, yellow
  • Stamps: Marvels of Nature set, flamingos, Mirror Image
  • Dye ink pads: black, green, blue, light blue
  • White pearlescent pigment ink pad
  • Markers
  • 4 yellow acrylic flat-back stones
  • Cloud template
  • Leaf texture plate
  • Bristle-brush applicator
  • Curved Rectangles die templates (#S5-006)
  • Die-cutting and embossing machine
  • Paper adhesive

Form a 5 x 7-inch side-folded card from blue card stock. Stamp flamingos with black ink at top of a 4 5/8 x 6 5/8-inch piece of white card stock. Reink flamingos and stamp onto Mirror Image stamp. Align images and use Mirror Image stamp to stamp flamingos directly below first stamped image.

Place cloud template at top of stamped rectangle and use bristle brush to apply light blue ink around edges, creating clouds behind flamingos. Color image, using bristle brush to apply blue inks on bottom half of rectangle.

Die-cut a curved rectangle around image. Use green ink to stamp tops of palm trees along edges at top of rectangle; repeat with blue ink at bottom of rectangle. Set aside.

Using texture plate and embossing machine, emboss leaves onto a 45/8 x 65/8-inch piece of pink card stock. Highlight leaves with white ink. Adhere to yellow card stock; trim a small border. Adhere to card front. Adhere stamped rectangle to card front; adhere acrylic stones to corners of stamped rectangle.

Sources: Stamp set from Innovative Stamp Creations Inc.; flamingos stamp from Great Impressions Rubber Stamps Inc.; Mirror Image stamp from Stamps by Impression; ink pads from Tsukineko Inc.; Copic markers from Imagination International Inc.; Dew Drops acrylic stones from The Robin’s Nest; cloud template from Rosie’s Roadshow.; texture plate from AccuCut; bristle-brush applicator from JudiKins Inc.; die templates from Spellbinders™ Paper Arts.

Whatchadoin? Reverse-Image Stamping Project, design by Connie Vogt

Whatchadoin? Reverse Image Stamping Project

Whatchadoin? Reverse Image Stamping Project

Materials

  • Card stock: dark turquoise, white, olive green
  • Turquoise printed paper
  • Stamps: fish, fishbowl, “Whatchadoin?”
  • Black dye ink pad
  • Markers including light blue
  • 5 clear gems
  • Plastic stamp positioner template
  • Corner rounder
  • Paper adhesive

Form a 7 x 5-inch top-folded card from dark turquoise card stock. Adhere a  6 3/4 x 2 1/2-inch piece of printed paper to bottom of card front.

Stamp fishbowl on right side of a 6 1/4 x 3 1/2-inch piece of white card stock. Stamp fish to the left of fishbowl. Ink fish image again and stamp on smooth side of plastic stamp positioner template. Flip template over and position fish inside fishbowl. Rub template to transfer inked image. Stamp “Whatchadoin’?” above first fish.

Color images. Round corners of stamped rectangle. Run light blue marker along edges of rectangle. Adhere to olive green card stock; trim a small border. Adhere to card front as shown. Adhere gems on top of bubbles.

Sources: Fish stamp from Great Impressions Rubber Stamps Inc.; fishbowl stamp from Just For Fun Rubber Stamps; “Whatchadoin’?” stamp from Rosie’s Roadshow; gems from Hobby Lobby Stores Inc.

Leave a comment


Spotlight on Card Making by Sharon Reinhart

Pin It

Take your card making skills to a new level and craft show-stopping greeting cards with the creative, spotlight technique.

In this article our focus will be on card making’s spotlight technique, which had its beginnings in the stamping arena and the art world. To describe the spotlight technique in context to rubber stamping, a portion of a stamped image is manipulated to bring emphasis to that part of the design, somewhat like a spotlight on a stage highlights a specific performer.

This card making technique is frequently seen in home decor pieces, where a portion of a canvas image is highlighted and repeated, and then adhered on top of that same portion on the original canvas. It is also evident in the advertising world when a small identical pull-off coupon or booklet is placed on top of the original image. This is done so that once the pull-off piece is removed, a full and complete image remains. For card making this is not our motivation; however, it could work beautifully, if your card were to include a gift element such as a removable magnet or bookmark.

Getting Started with Spotlight Technique in Card Making

To spotlight a rubber-stamped image, the first step is to stamp the image twice (Fig. A).

Figure A

Figure A

Choose the desired area of the image to be spotlighted and cut it out using a punch, die- or shape-cutting system (Fig. B).

Figure B

Figure B

Layer the punched portion onto the original image lining it up exactly with the bottom image (Fig. C).

Figure C

Figure C

To go beyond the basics, color the punched or die-cut spot using markers, inks, chalks, colored pencils or glitter glue (Fig. D).

Figure D

Figure D

To craft a reverse spotlight, punch the shape  from one stamped image, and instead of layering  the punched piece onto the second stamped image, layer the panel with the punched-out portion onto the original (Fig. E).

Figure E

Figure E

Keep in mind that the shape of the spot does not have to be round. Make your spotlight piece for your next card making project truly original by considering one of the many shapes available such as squares, flowers, scallops, hearts, ovals and beautiful label shapes, to mention a few.

Getting Creative Using Card Making’s Spotlight Technique

In addition to the often-used rubber-stamp version, a variety of different mediums and supplies may be used to create spotlight card projects. Photos are one quick and easy option to consider. There are a couple of ways to work with photos to use the card-making spotlight technique, one being to use a black-and-white photo as the base, and then punch or die-cut a spotlight from a color photo and place on top. Spotlighting is a beautiful card-making technique to use with wedding and nature photos in particular.

The other spotlighting method to use with photos and card-making projects is to use two identical photos, creating a spotlight from one. Mat or layer the spotlight with card stock, leaving a small margin around the spot, and then layer onto the original photo. If you do not wish to mat with card stock, create emphasis around the spot by applying ink or a marker to the edges of the spot.

Inspiration for card making’s spotlight technique can also be found in the beautiful card stocks and papers available on the market today. Nothing is quicker than spotlighting an image that is already printed for you. Dictionary pages and music script are yet another interesting source of materials.

With the lovely embossing folders on the market, embossed designs are a snap to create, not like in the past where all the beautifully embossed card-making designs were painstakingly created by hand (Fig. F). Spotlight an embossed image or a portion of a full design (Fig. G). Color with chalks, colored mists, airbrushing and inks, or even try spotlighting the image in a contrasting color of card stock (Fig. H).

Figure F

Figure F

SpotlightOnCardMaking_Page_2_FigG

Figure G

SpotlightOnCardMaking_Page_2_FigH

Figure H

Rub-on words or images are further sources of creating a spotlight in a card-making project. As before, two of the same images are needed. Follow the basic spotlight method as stated above and voilà! Your card-making design is on the way to spotlight bliss.

Embellishments add that little extra touch. Rhinestones and beads are a perfect addition to accent a spotlight on a card project. As the director, you are in charge of the spotlight and who or what is being spotlighted. Enjoy the process!

Circle of Friends Card Making Project, designed by Sharon Reinhart

Circle of Friends Card Project

Circle of Friends Card Project

Materials

  • Card stock: shimmering cream, navy blue, brown
  • Back Country double-sided printed card stock
  • 14 1/2 inches 1/4-inch-wide brown grosgrain ribbon
  • “friend” stamp
  • Light brown chalk ink pad
  • Branch punch
  • Standard Circles SM die templates (#S4-116)
  • Die-cutting machine
  • Double-sided tape
  • Adhesive foam dots
  • Paper adhesive

Form a 5 1/2 x 5 1/2-inch side-folded card from cream card stock. Wrap ribbon around card front as shown; tie in knot, trim ends.

Cut a 4 1/4 x 5 1/4-inch piece of printed card stock; adhere to card front as shown. Choose area of printed card stock that will match area you want to spotlight on card front. Die-cut this piece of card stock by nesting together the 3 1/2-inch circle die template and the 2 1/8-inch circle die template to die-cut a 1 1/16-inch-wide ring. Adhere using foam dots to card front as shown.

Stamp “friend” onto cream card stock and cut out with a small border. Punch four branches: two from navy blue card stock and two from brown card stock. Adhere to back of “friend” rectangle; attach to card front with foam dots  as shown.

Sources: Card stock from Bazzill Basics Paper Inc.; printed card stock from The Paper Loft; stamp from Magnetic Poetry Inc.; chalk ink pad from Clearsnap Inc.; branch punch from Martha Stewart Crafts; die templates from Spellbinders™ Paper Arts.

Hope Card Making Project, designed by Sharon Reinhart

Hope Card Project

Hope Card Project

Materials

  • Card stock: olive green, white smooth
  • Botanicabella Birds In Paradise double-sided printed paper
  • Transparency sheet
  • Stamps: Spring Butterflies, “Hope”
  • Black dye ink pad
  • Glaze pens
  • Small paintbrush
  • Die templates: Petite Ovals SM (#S4-140), Labels One (#S4-161)
  • Die-cutting machine
  • Double-sided tape
  • Foam mounting tape
  • Paper Adhesive

Form a 5 1/2 x 5 1/2-inch side-folded card from olive green card stock.

Cut two 5 1/8 x 4 1/4-inch pieces of white card stock; stamp both with Spring Butterflies stamp.

Cut nine leaves from printed paper. Attach seven of the leaves to the bottom edge of one of the stamped rectangles. Adhere rectangle to card front as shown.

Determine area to spotlight on card front and die-cut image from remaining stamped piece, using 2 3/8-inch label die template. Color spotlight piece using glaze pens and watercolor method. Note: To watercolor using glaze pens, scribble desired pen color onto transparency sheet; dip paintbrush into water, then dip into ink from pen scribble. Color image as desired. Let dry.

Lining up stamped images exactly, adhere die-cut piece to card front with foam tape.

Die-cut a 2 x 7/8-inch oval from printed paper; stamp striped side of paper with “Hope.” Adhere to card front as shown.

Sources: Card stock from Bazzill Basics Paper Inc.; printed paper from Graphic 45; Spring Butterflies stamp from The Artful Stamper; “Hope” stamp from Stittsville Rubber Stamp Inc.;  glaze pens from Sakura of America; die templates from Spellbinders™ Paper Arts.

A Little Bling Card Making Project, designed by Sharon Reinhart

A Little Bling Card Project

A Little Bling Card Project

Materials

  • Card stock: black, white, red
  • Wavy Line Flourish stamp
  • Black dye ink pad
  • Various-size self-adhesive rhinestones: 1 red, 3 black
  • 1 1/2-inch circle punch
  • With Gratitude die set (#37-1163)
  • Spots & Dots embossing folder (#37-1145)
  • Die-cutting and embossing machine
  • Adhesive foam tape
  • Paper adhesive

Form a 4 1/4 x 5 1/2-inch side-folded card from black card stock. Cut a 4 x 51/4-inch piece of white card stock. Emboss with embossing folder; adhere to  card front.

Cut a 1 1/2 x 4 3/8-inch piece of white card stock; stamp with Wavy Line Flourish. Repeat on a second piece of white card stock. Cut a 1 3/4 x 4 5/8-inch piece of black card stock; adhere stamped rectangle to black rectangle. Adhere layered rectangle to red card stock; trim a small border. Using foam tape, attach layered rectangle to card front as shown. Punch a 1 1/2-inch circle from center of remaining stamped image; ink edges and accent with rhinestones. Using foam tape, attach over image on card front as shown.

Die-cut “Thank You” from red and black card stock. Adhere to lower left of card front, layering black “Thank you” over red.

Cut a 3 1/2 x 4 3/4-inch piece of white card stock; adhere inside card. Die-cut square “thanks” from black card stock. Adhere to white card stock; trim to a 1 7/8 x 1 7/8-inch square. Adhere to red card stock; trim a small border. Adhere to white card stock  inside card.

Sources: Stamp from Inkadinkado; ink pad from Clearsnap Inc.; circle punch from Marvy Uchida; Cuttlebug die set, embossing folder, and die-cutting and embossing machine from Provo Craft.

Center Stage Card Making Project designed by Sharon Reinhart

Center Stage Card Project

Center Stage Card Project

Materials

  • Card stock: black, cream
  • Fabric with repeating floral pattern
  • Gold brad
  • Gold pearlescent dimensional medium
  • Large and small tag dies
  • Moroccan Screen A2 embossing folder (#A2-37-1909)
  • Die-cutting and embossing machine
  • Hole punch
  • Double-sided adhesive sheet
  • Adhesive foam tape
  • Paper adhesive

Form a 4 1/4 x 5 1/2-inch side-folded card from black card stock. Emboss center of card front with embossing folder, leaving a 3/4-inch border on top and bottom of card front. Accent some of the embossed motifs on left side of card front with pearlescent dimensional medium. Let dry.

Cut two 4 x 6-inch pieces of fabric with matching patterns. Adhere double-sided adhesive sheet to back of both pieces of fabric. Die-cut one large tag from one piece of fabric. Matching a portion of pattern in large tag, die-cut a small tag from other piece of fabric.
Die-cut a large tag from cream card stock.

Adhere large fabric tag to card-stock tag leaving a margin of card-stock tag showing on right side. Referring to photo, punch a hole through center top of large tags and insert brad. Adhere large tag to card front as shown with foam tape. Adhere small tag to cream card stock; trim a small border. Using foam tape, attach to large tag aligning patterns on fabrics as shown.

Sources: Liquid Pearls™ dimensional medium from Ranger Industries Inc.; Cuttlebug embossing folder, and die-cutting and embossing machine from Provo Craft.

Leave a comment


How to Sew 12 Quick Hems by Machine by Peggy Bendel

Pin It

Reap extra dividends from your sewing machine investment by using it to stitch the hems in the things you sew. After reading this article, you’ll have the basic whys and how-tos for how to sew a dozen different sewing machine-stitched options.

Yes, there is definitely a place for hand-sewn hems, but often the machine-stitched alternative looks better and is easier to execute. You’ve probably noticed machine-sewn hems are found on virtually all ready-to-wear fashions and decorator furnishings today, no matter how high the price tag.

When you tap the power of the sewing machine for hemming, you’ll create a finish that’s not only polished, but quick to sew, strong and durable, too. Among the dozen hem finishes shown here, you’ll find one that’s probably just right for your current sewing project.

1 HOW TO SEW A TOPSTITCHED HEM

This hem can be sewn on any straight-stitch machine model and suits a wide variety of fabrics. As an option, you can choose contrasting or decorative thread to make the hem an interesting detail. When sewing layette items or children’s clothing, feel free to substitute a decorative stitch pattern for the straight stitching.

  1. Finish the raw edge of the hem allowance with serging or zigzagging, or clean-finish it (turn under and press 1/4 inch, edgestitching if desired).
  2. Turn up the hem allowance width, press and pin in place. Place the pins parallel to the folded edge with the pinheads toward you so you can easily remove them as you topstitch close to the finished edge. If you serged or zigzagged the edge, position the stitching along the inner edge of the finishing stitches. If you turned and pressed the edge, stitch close to the fold (Figure 1).

Figure01

Optional: Sew a second row of stitching, if desired, placing it 1/4 inch below the first row. Use the edge of a sewing machine’s 1/4-inch presser foot to guide the stitches for even stitching.

2 HOW TO SEW A TWICE- TOPSTITCHED HEM

This hem finish is traditionally used on jeans and other casual sportswear. While a single topstitched hem can be done with almost any hem allowance width, this one is traditionally used for narrower hems where a durable edge finish is desired. When working on a thick or stiff fabric such as denim, use a size 16 jeans needle on your sewing machine, which is designed to penetrate multiple layers of fabric.

  1. Allow for a 1-inch-wide hem allowance when cutting the pieces for a finished hem of 1/2 inch.
  2. Turn under and press the full width of the hem allowance (1 inch).
  3. Turn the raw edge under to meet the fold and press.
  4. Topstitch close to the lower and upper folded edges of the hem  (Figure 2).

Figure02

3 HOW TO SEW A TWIN-NEEDLE TOPSTITCHED HEM

Although not limited to use on knits, the twin-needle hem is a good one for this fabric type because it has some built-in give. Purchase a twin needle for your sewing machine — two needles attached to each other with a crossbar and a single shank. In a single pass, this sewing machine needle sews two perfectly parallel rows of topstitching while the bobbin thread forms a zigzag on the underside that links the two rows, adding a little give to the stitching (Figure 3).

Figure03

Twin sewing machine needles are available in several sizes and are labeled with two numbers, such as 2.0/80. The first number is the spacing between the needles, and the second is the needle size. Consult the sewing machine manual to learn how to set up your model with a twin needle and thread it correctly.  If you are using this hem on a knit, there is no need to finish the raw edge of the hem allowance. For other fabrics, finish as desired  (see choices in Topstitched Hem).

  1. Turn and press the hem allowance.
  2. Hand-baste the hem allowance in place 1/8 inch below the upper edge.
  3. Topstitch the hem in place, arranging it under the foot so that the stitching is inside the basting and equidistant from the folded edge all around. See Elastic to the Rescue below.

4 HOW TO SEW A FUSED & TOPSTITCHED HEM

Using a strip of fusible web makes this 1/2-inch-deep hem easy to accomplish. The finished hem gains extra stability and crispness from the fused layer and looks best on sturdy, woven fabrics and hem edges that are straight rather than curved or A-line. It is not recommended for lightweights or softly draped designs that rely on a fluid edge to achieve the desired look (Figure 4).

Figure04

  1. Allow for a 1-inch-wide hem when cutting the pieces or trimming away any excess hem allowance.
  2. Apply 1/2-inch-wide fusible web along the cut edge of the hem allowance on the wrong side. Remove the protective paper on the fusible web, and then machine-stitch or zigzag it in place close to the hem allowance raw edge.
  3. Turn up a 1/2-inch-wide hem allowance and fuse in place following the manufacturer’s directions and using a press cloth as needed to protect the fabric.
  4. Turn the fused hem up again and press. Topstitch in place close to the inner folded edge.

5 HOW TO SEW A MACHINE BLINDSTITCHED HEM

This hem looks almost invisible from the right side and is the household equivalent of the hemming stitch produced by an industrial specialty machine. Use it on garment hems and as a very practical timesaver when sewing the long, straight hems on the sides and bottoms of drapery panels and other flat home decor. Once you’ve mastered the trick of folding the fabric, sewing machine blindstitching is easy.

  1. Attach a special blindstitch presser foot to your sewing machine. This type of foot usually has a blade in between the toes to guide along the fold for even stitching.
  2. Select the built-in blindstitch on your sewing machine and adjust the stitch length and width as directed in your machine manual.
  3. Finish the raw edge of the hem allowance with a clean finish, serging or zigzagging.
  4. Turn under and press the hem allowance, and hand- or machine-baste in place 1/2 inch below the finished edge (or, pin it in place with pins 1/2 inch below and parallel to the finished edge; the blindstitches will form a safe distance away from the pins).
  5. With the project wrong side up, turn the basted hem under to the right side to expose the finished edge with a fold in the garment to the right (Figure 5). Figure05
  6. As you stitch along the fold, the sewing machine will make a series of straight stitches along the fold and then take a zigzag stitch that just barely pierces the fold (Figure 6).

Figure06

Note: When you’re finished blindstitching with your sewing machine and you unfold the hem, tiny vertical stitches will lie on the surface on the garment right side. They should be barely visible if the stitch has been adjusted correctly and you have used thread that is a close match to the fabric color (or invisible thread in the needle).

If the zigzag is set too wide for the fabric thickness, these stitches will be too obvious. If not wide enough, you may miss the fold entirely. For that reason, it is essential to test the stitch width and length on fabric scraps before you begin using your sewing machine to blindstitch on the actual sewing project.

6 HOW TO SEW A BIAS-BOUND HEM

This neat, narrow hem is accomplished with purchased doublefold bias tape. Select a tape color that matches or accents the fabric color. You can use this style of hem on straight or curved edges, and it requires no extra fabric for a hem allowance. For easier handling on curved edges, steam-press the tape into a matching curve before applying it.

  1. Trim away the entire hem allowance.
  2. Encase the fabric raw edge with the tape so that the wider fold of tape is on the wrong side of the fabric. Make a neat join where the ends of the tape meet, positioning it away from a seam to avoid a noticeable lump.
  3. Sew close to the edge of the tape from the right side, stitching through all layers; the topstitching on the right side will catch the wider underlayer. Take your time arranging the tape to ensure that it is correctly positioned (Figure 7).

Figure07

Elastic to the Rescue

When you need a guide for stitching widths beyond 3/4 inch, make an elastic “bracelet” that fits snugly around the free arm of your sewing machine.

  1. Use a piece of sturdy 1-inch-wide elastic and sew the ends together for a snug fit around the free arm on your sewing machine.
  2. Slip the bracelet over the free arm and position the left-hand edge of the elastic the desired distance from the needle. Then guide the fabric along the elastic. If you make the elastic bracelet fit snugly, it should stay put while you sew. If it doesn’t, use a piece of blue painter’s masking tape to hold the right-hand edge in place temporarily. When you don’t need the guide, simply slip to the right on the free arm as far as possible to move it out of the way.

7 HOW TO SEW A SERGED & STITCHED NARROW HEM

Choose this hem for the lower edge of full skirts cut from lightweight fabrics. It is quick and easy and results in a soft hem finish without stiffness.

  1. Thread the serger with lightweight thread — rayon embroidery or cotton embroidery thread — in a color to match the fabric. Adjust the stitch so it is 1/4 inch wide and a length appropriate for the fabric. Test on a single-layer scrap of the fabric. Adjust the sewing machine’s differential feed, if available, for smooth, pucker-free stitching.
  2. Mark the hem and trim the excess hem allowance, leaving only 1/4 inch for the turn-up allowance.
  3. Serge-finish the cut edge, skimming away only a thread along the edge with the serger knife.
  4. Turn the serging to the inside and press. Stitch 1/8 inch from the turned-and-pressed edge (Figure 8).

Figure08

8 HOW TO SEW A DOUBLE SERGED & STITCHED HEM

For a slightly weightier hem finish, make a doubled narrow hem. This one makes a lovely finish on garments made from lightweight fluid or gossamer fabrics, or garments that have layered, floating panels as a design detail. Unlike the single-layer hem, the serging doesn’t show — making it a more visually pleasing finish for a hem that may show as the wearer moves in the garment.

  1. Complete steps 1–3 as directed for the Serged & Stitched Hem above.
  2. Turn and press the serged edge to the wrong side.
  3. Turn the serged and turned edge again and topstitch in place close to the inner fold (Figure 9).

Figure09

9 HOW TO SEW A MACHINE ROLLED  OR FLAT HEM

You’ll need a special flat hemmer or rolled-hem presser foot for your sewing machine to make rolled or flat hems. The rolled-hem foot has a round groove on the bottom and creates a rolled hem. The groove on the flat hem produces a narrow flat hem. Both feet work in a similar way and come in several sizes. The 2mm rolledhem foot makes a finished hem that is 1/16 inch wide on sheer fabrics. Choose this sewing machine-made hem to add a delicate finished edge to sheer fabrics, bridal veiling and other lightweight fabrics.

Either sewing machine foot is also a good choice for hemming yards and yards of fabric for ruffles and for finishing scarf edges. Both work in a similar fashion — as you feed the fabric into the scroll in front, it rolls the edge and straight stitches secure the roll.

Refer to Figure 10 and read through the steps below. Then practice on fabric scraps to learn how to guide the fabric into the sewing machine foot for best results. Use a soft thread for rolled edges to further enhance the soft edge.

  1. Choose the sewing machine foot for the desired finished width (2–6mm).
  2. Trim any excess hem allowance away, leaving a 1/4-inch seam allowance for the fine rolled hem. For flat hems, measure the bottom groove on the foot and multiply that width by two to determine how wide the hem allowance should be.
  3. Attach the rolled-hem foot to your sewing machine.
  4. If you are hemming a circular edge, undo the stitching in one seam for a few inches so you can begin the hem at an edge and finish sewing the seam after the hemming is complete.
  5. To begin the hem, turn and fingerpress a narrow double hem for about 2 inches at the beginning of the edge to be hemmed.
  6. Insert the folded edge into the scroll on the top of the sewing machine foot, hold the thread ends in back of the foot and start stitching slowly (Figure 10). Use your fingers to guide the hem edge into the scroll and continue stitching to the end.

Figure10

10 HOW TO SEW A DESIGNER  ROLLED HEM

This narrow hem is sometimes called the “Calvin Klein hem.” It’s quick and easy and best suited to light- to medium-weight silks, polyester silkies, cottons and rayons. Use it on either bias or straight edges. If you don’t have a serger, the designer rolled hem is the perfect substitute for the double serged and stitched hem. Thread the sewing machine with rayon or cotton embroidery thread for the softest finish. Refer to Figure 11. If available, attach an edgestitch sewing machine foot to help guide the fabric edge for even stitching.

Figure11

  1. Trim the hem allowance to 5/8 inch if necessary.
  2. Turn under and press only 3/8 inch of the hem allowance. Machine-stitch 1/8 inch from the turned-and-pressed edge (a).
  3. Trim the hem allowance close to the stitching (b).
  4. Turn the stitched edge again and edgestitch (c).

11 HOW TO SEW A LACE-EDGED HEM

If you enjoy sewing lingerie, evening wear or romantic dresses and separates, you’ll find this hem is an easy way to add pretty detail.

  1. Trim the hem allowance away so that when the lace is added, the project will be the desired finished length. Serge- or zigzag-finish the raw edge.
  2. Lap scalloped lace galloon edging over the finished edge and topstitch along the upper edge of the lace (Figure 12). Figure12

12 HOW TO SEW A SHELL-STITCHED HEM

The shell hem is a popular choice for lingerie hems, adding a softly scalloped detail. Test the stitch settings on fabric scraps first after reading through the following steps. Refer to Figure 13.  Figure13

  1. Attach the sewing machine’s zigzag presser foot and select the built-in blindstitch; mirror image the stitch. On newer sewing machines, you may have a picot stitch that is oriented in the correct direction. Check your manual.
  2. Trim the hem allowance to 5/8 inch wide and turn under.
  3. Working with the right side facing up, blindstitch over the turned edge so that the zigzag stitch does not catch the edge but rather draws it up to create the lightly scalloped effect.

Note: If you have a built-in blindstitch but are unable to mirror-image it, you will need to sew with the turned edge to the left of the presser foot.

Because the sewing machines we use today are so versatile and full of features and special stitches, it seems as if there’s always something new to learn. After you’ve mastered these methods for machine-stitched hems, check the sewing machine’s manual to discover additional ways to stitch functional and decorative hems  by machine.

10 Comments


Form & Function … Think Before You Begin Your Beading Projects

Pin It

Why talk about form and function for beading designs? Keep reading!

Beaders will tell you that the exciting part of beading is designing. It’s choosing your beads and findings, artfully arranging them and creating a beautiful piece of beaded jewelry that draws compliments from admirers.

However, if you don’t thoughtfully consider the techniques and materials you plan to use, that beautiful piece of finished jewelry may not last, or you may end up with a gorgeous necklace that is too uncomfortable to wear.

And in all honesty, if you don’t learn some basic jewelry design principles, your beaded jewelry may not be so beautiful! Form and function are the two elements at play here, and it is important to understand how to create a happy union between the two of them.

You can find a great variety of beautiful design inspirations online. Beaded jewelry designers work tirelessly to test the limitations of their materials and make beading projects that are lovely to view and carefully constructed. How do they do it? How can you learn to make beaded jewelry that lasts for many years to come and looks like the pieces in your favorite fashion magazine? I’m about to share the secrets that will help you bead like a pro!

Beading-Form-and-Function

Form

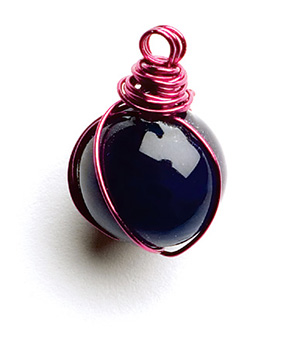
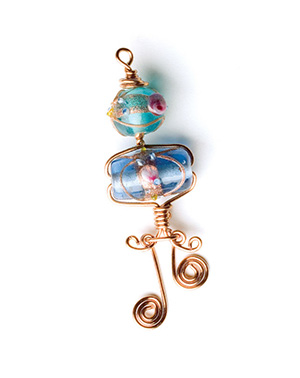
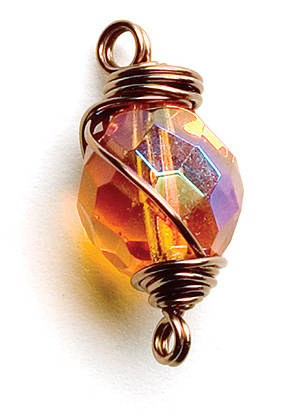
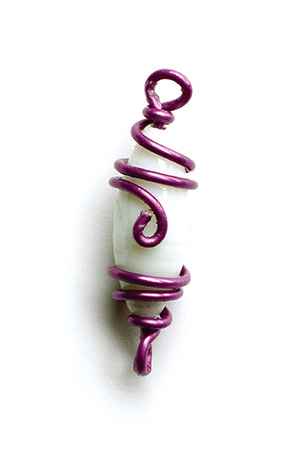
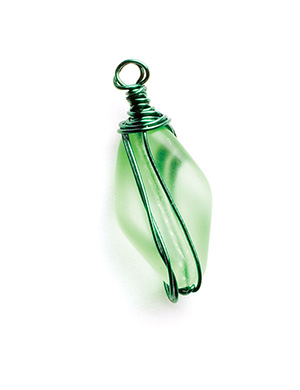
Form refers to the choice of beads, the juxtaposition of colors, textures, styles and materials that result in a one-of-a-kind (and hopefully attractive) design. This is second nature for some lucky gals and guys. They just have the eye for it. They can intrinsically combine elements in a seamless fashion to make amazing jewelry. Don’t you just hate them? They are like the people who claim that they can eat all they want and never gain a pound … ugh.

For most of us, a little understanding of basic art principles is the key to finding and exercising your inner designer. I recommend you get yourself a few basic items to learn how to work with color and texture.

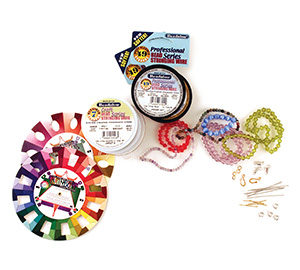
First, a color wheel, especially one that includes windows that showcase different color combinations, is a very useful tool as you are learning about color theory. Purchase a book or two on color theory to learn about primary, secondary, tertiary, complementary, analogous, split complementary colors. If you don’t know these terms, then you most definitely will benefit from a primer on color.

Armed with an understanding of color and hue and saturation, when you face a head-spinning array of bead choices, you will find it far easier to narrow things down and select beads that work well together.

Now that I’ve covered color, let’s move on to the second element — texture. Studying texture is best done by getting out and looking at the world around you. Consider how the bark of the tree contrasts with the leaves. And what is it about the river rocks and the way in which they complement the rushing water? If you’re lucky enough to be in a tropical environment, ask yourself how does the palm tree work with the sand and the sea? This may sound a little new-age in theory, but it works!

When you begin to look at the world in this fashion, you soon find yourself pulling these textures into your work. This is a very intuitive process, and one that is unique to your individual tastes and personality. We all view the world through our own set of eyes, and the key to discovering your inner artist is to take a close look at the world around you, trying to see it as you would for the first time. Sometimes it is a flower garden, sometimes a lovely swatch of vintage fabric, sometimes a rustic barn door, sometimes the fur on an animal — anything is fair game when it comes to exploring your world in search of inspiration.

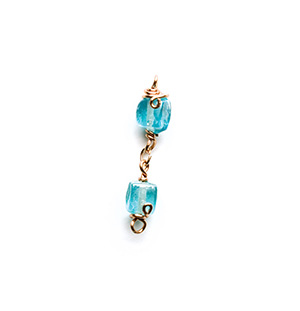
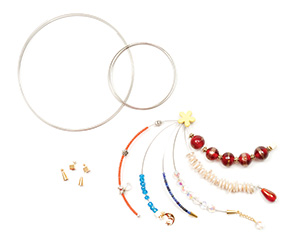
As for the beads and findings that you choose, this is up to your developing sense of aesthetics. Silver or gold, precious metal or plated, gemstone, glass or plastic — only you can decide. Each choice gives your beaded jewelry a particular mood or emotion. Gold is warm, sensuous, luxurious; silver is cool, modern, sleek and sexy. Gemstones can be elegant or earthy, depending on the stone. Glass can be playful or sparkly, and plastic can be fun and funky.

Plated metal is very affordable, and there are some very high-quality findings out there these days. For a professional look and feel, you might want to choose precious metal for your beaded jewelry designs.. If you take the time to decide which mood you want to create, you’ll find it easier to select and arrange the components in your beading design.

Function

Now that you have a better grasp of design or “form”, it is time to face the potentially ugly and frustrating element of “function.” But don’t be afraid; I’ll cover a few basic tips and techniques that will make function a piece of cake!

When working with the materials of a beaded jewelry project — beads, findings and stringing materials — having a good understanding of what makes strong, lasting and comfortable jewelry is extremely important. Nothing is more annoying than making a piece of beautiful beaded jewelry and then realizing that it weighs too much to wear it comfortable, except possibly having your beautiful design break and your beads fly in every direction. I recommend that you purchase a good, basic book on bead stringing and practice, practice, practice. Now I’m going to address a few common problems related to a beaded jewelry design’s function.

My beading wire keeps breaking.

Beading wire is available in many different diameters. Each is for specific applications. Read the packaging to see the break strength (amount of weight and pressure the wire can withstand). The heavier your design, the more stress it will be under when worn and the greater-strength wire you will need to use on your beaded jewelry project. Use wire that will fill up the holes in the beads. If the wire is floating inside the beads, it can wear quickly and break.

Watch out for glass and gemstone beads that may have sharp edges. Use a bead reamer to smooth these out and protect the wire from abrasion. There are hand, battery and electric bead reamers on the market, and these are crucial tools for the beader.

Another cause of your wire breaking may be crimp beads taht are not carefully flattened. They can create micro cuts in the stringing wire, causing it to break. Be certain that the crimp tube or bead is straight up and down inside of the crimp tool and that you uncross the wires inside of the crimp before crimping. If you take a moment here, you will save yourself from restringing.

Also, know that beaded jewelry needs to be restrung periodically. Nothing lasts forever. Keep an eye on your beading designs, and if you see signs of extreme wear, it’s probably time to restring. It’s far better to take a proactive approach to restringing your designs than to lose your some of your favorite beads when your jewelry’s wire unexpectedly breaks.

My beaded jewelry design is too stiff.

When a strand of beads is rounded and secured, you need to leave some space between the beads to keep the design from being too stiff or tight. Before you crimp, hold the strand of beading wire from the clasp and slide your beads down the wire to remove the exposed strand between the top bead and the crimp. I like to use chain-nose pliers to grasp the wire tail while pushing the crimp bead down with my thumb and forefinger, but don’t crimp yet!

The next step is key to creating “play” or spacing between your beads. Attach the clasp so the design is rounded as it will be worn, and adjust the crimp bead and wire as before. Now you can crimp and be assured of a fluid design.

Lighter beads may need a very lightweight wire. When featuring tiny beads, I like to work with seed bead spacers and .010–.015-inch-diameter wire to make designs that are extremely fluid and wear like knotted silk. Just be sure that you ream the insides of the beads when you work with thin diameter wire.

My beading design is too heavy.

We’ve all been there at one point or another. You put on a pair of beautiful earrings and find that they’re too heavy for your ear lobes. Or you try on a stunning necklace and realize it’s too heavy to comfortably wear for longer than a few minutes. Before you bead, take a look at the beads you’ve chosen. Are they all bulky gemstones or glass beads with heavy metal findings? If so, will that be comfortable to wear? Try to combine heavy beads with lighter choices, or work with large-scale beads that are lightweight.

My clasp keeps slipping to the front of my neck.

This is another big annoyance we’ve all experienced. To avoid this common jewelry problem, ,ake sure that the clasp you use is the right size and weight for your beaded necklace design. If you select a clasp that is too bulky or heavy for the beads, it will slide to the front. Sometimes you have to relinquish form for function here.

My beads won’t fit my head pins.

Gems (and pearls in particular) often have very small, hand-drilled holes. You have a couple of options here. Either choose thin diameter (24-gauge) head pins, or use the handy-dandy bead reamer to open up the holes. Either method works well.

My beading wire keeps getting kinks in it.

Beading wire is constructed of many tiny strands of stainless-steel wire coated with nylon. Although it is strong, flexible and resilient, strands of beading wire will easily kink if you crumple up your beaded jewelry in a box or toss it in the bottomless pit of a handbag. So always be sure to hang your beaded jewelry from a hook, nail or doorknob to keep it from getting destroyed.

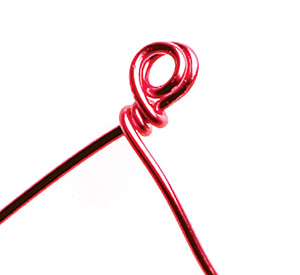
The loops on my head pins are funky shaped, ugly and my coils aren’t very appealing either.

This is a matter of two things — tools and technique. You need good tools and lots of proactice. The finer the point on the end of your round-nose pliers, the tighter your coils and loops will be. The more you practice making loops and coils, the better they will look. Don’t sweat it too much; there are plenty of jewelry pieces in stores, magazines and catalogs that doesn’t look so perfect either. Most people, other than your anal-retentive beading buddies, aren’t going to notice the sorry state of your loops. Once you get the hang of the technique, your loops will rock with the best of them.

My toggle clasp won’t work. What’s the deal with it?

If your final beads are too large, the bar end of the toggle will not be able to slip into the circle end. The fix is fairly simple. Just crimp the beading wire to a jump-ring link and add on as many more links (probably one or two) as necessary to allow the bar to slip into the circle.

These are some of the more common issues beginners encounter in their beading adventures, but I’ve only scratched the surface. Realize that even professional designers make mistakes. This is where a smattering of patience and a willingness to learn come into play. So get started, practice and be proud of the jewelry you make. The more you bead, the easier it becomes. Before long, you’ll notice improvements in both the form and function of your beading projects. If you need a little encouragement, compare your most recent beading design with your first and you’ll see the difference.

Also, enjoy the process of designing beaded jewelry and completing your projects, and know that occasionally breaking the rules can lead you to exciting new techniques and discoveries. Start to look at the work of professional designers and you will begin to learn about good design, and even more importantly, begin to define your own, one-of-a-kind beading style.

By Margot Potter

Leave a comment


Getting Back to Card-Making Basics

Pin It

Whether you just recently stepped into the wondrous world of card making or you’re a seasoned crafter whose collected more masses of paper and tools than you can shake a stick at, knowing and reviewing basic tools and terms will guarantee you years or triumphant card making success!

Wondering through the paper-craft or rubber-stamp store, for an experienced card maker, is like a trip to the candy store for a child with a serious sweet-tooth. Beautiful papers, shiny stickers, and the latest, greatest tools, are all temptations to add to our shopping basket. However, for the beginner, deciding how and where to get started or what to purchase, can seem like a daunting task. Learning the basics and laying the right foundations for enjoyment of your craft, are the hallmarks of success and the best ways to avoid frustrations along the way. Let us help you build that foundation right here, beginning with getting “Back to Basics”!

THE TOOL KIT

As a beginner card maker, one of the first things you’ll attempt to put together is a basic  paper-and-card-crafting toolkit. Here are some important items to include:

1) Paper Trimmer
2) Scoring Tool
3) Bone Folder
4) Metal-edge Ruler
5) Pencil
6) Scissors
7) Craft Knife and Mat
8) Piercing Tool and Foam Mat
9) Adhesive

After a while, your toolkit will begin to evolve according to your particular interests. Consider adding a few out of the ordinary tools for specialized work, like:

1) 1/8-inch hole punch
2) Tweezers or small pliers
3) Decorative-edge scissors

PAPERS

The are several different varieties of paper to choose from – plain, printed, mat, glossy, single-fisted, double-fisted, and textured. The weight of these papers varies greatly, from heavier, sturdy card stocks ideal for use as a card-base, to lighter-weight papers such as Japanese papers in an array of various colors, ideal for adding layers or embellishment. Vellum and parchment paper have a translucent quality to them and are available with colored, plain, printed, textured, and iridescent effects.

ADHESIVES

There are just as many types of adhesives as there are types of paper. It is vital to choose an adhesive that works just right with the type of paper you are using. For example, if you are using vellum paper, it is extremely translucent and most adhesive will show through. Read the label and only use an adhesive that works with your specific type of paper. Here are some examples of perfect paper-adhesive pairing below:

• Adhesive dots — good for hard embellishments such as metal pieces, rhinestones and buttons

• Vellum tape — transparent adhesive for use with vellum

• Foam mounting tape — use to raise or lift elements to create dimension

• Double-sided liner tape — liner sheet covering adhesive, some are heat resistant

• Tape runner – quick to use, come in a hard case, often disposable

• Repositionable tape — not permanent

• Tape sheets — sheets of double-sided tape

• Glue stick — great for large coverage

• Glue pen — good for tiny areas

Another option is to use a machine that applies adhesive to your paper, ribbon, or thin embellishment after you place them inside of it. (Xryon is a company that manufactures such machines).

CARD SIZE AND STYLE

When it comes to card creation, any shape or size is possible. However, some of the most common sizes are:

• 41/4 x 51/2-inch (A2)
• 6 x 6-inch square
• 5 x 7-inch (A7)
• 81/2 x 4-inch

Create a card in a top, side or gatefold orientation to best fit the design you’ve chosen. Accordion-style cards, window cards and shaped cards are further options to consider and are an easy way to add interest to your project. If stock envelopes aren’t available for a particular card size, then you can modify a large envelope, make a custom one using a template, or you can simply use a small paper bag as another alternative.

Score your card stock before folding, in order to create a clean, professional base. There are several tools and methods to do this, but for starters you can use the basic bone folder or stylus, along with a ruler, to create a smooth, straight score line. Paper trimmers like those by Fiskars or Marvy Uchida, include a score blade that can be used just like a cutting blade. Also, there are boards with measured grooves and a scoring tool, like Scor-It Board or Scor-Pal. Regardless of the method you choose, practice first, as each method will react differently, depending on the pressure used and the type of paper.

THE LANGUAGE

Understanding what people and instructions are saying is important. There is a defined language of crafting. Here are some common terms:

• Score — create an indentation in the paper in order to have a crisp fold

• Burnish — reference to the use of a bone folder on the score line when folding, or to rub the surface to secure when adhering

• Mountain fold — upward fold like a mountain

• Valley fold — downward fold like a valley

• Portrait — card orientation similar to a portrait of a person, longest measurement being vertical

• Landscape — card orientation similar to a picture of a landscape or the horizon, longest measurement being horizontal

• Gatefold — style of card with a right and left flap that join in the middle like a gate

• Accordion — style of card where vertical score lines create panels resembling an accordion, or scoring a strip to create accordion pleats

• Die cut — a shape cut using a die and machine

• Pressure emboss — texture or designs created with embossing folders, dies, stencils, stylus, with hand or machine pressure

• Heat or thermal emboss — created with inks, embossing powders or enamels, and a heat tool

• Direct to paper (DTP) — technique where inks are applied directly to the paper from the ink pad

• Dashed line — usually refers to fold line

TECHNIQUES

A huge number of techniques exist and you’ll probably find yourself drawn to one more than many others. You can combine techniques to create further visual interest. There are NO set rules or limitations to card making, so jump in and get started and enjoy getting back to the simple basics with your card making.

Leave a comment